How to Add Beads to a 12 Warp Kumihimo Round Braid

SKU VID-1598
Designer: Kat Silvia
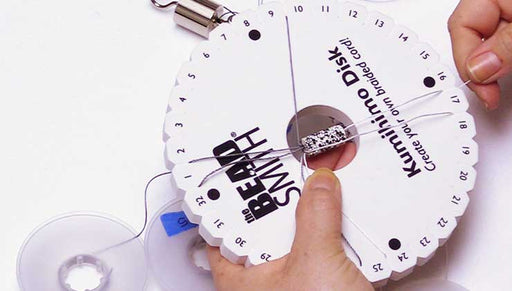
In this video you will learn how to add beads to a 12 warp Kumihimo braid. You will also see how to remove a stuck bead with bent nose tweezers and a few examples of design options you have when making a Kumihimo braid.
Audio Transcript
Note: This audio transcript is auto-generated and may not be completely accurate.
Hi, this is Kat with beadaholique.com i hema now if you've watched my previous video i showed you these two examples here of how to do a 12 warp kumihimo and the difference between a 12 and an 8 is you're seeing that you're having that sort of focal spiral that goes around there and in this case it is that beautiful gold color so I did this example and I also showed you this example as well it's the same this uses satin rattail so for today's demonstration I'm going to show you how to add beads now I have two examples here one of them is a these are both 12 warp this one has one focal color of that beautiful gold and then I used a bead mix on the center there so it didn't matter where I placed my beads so this is what a nice 12 warp with 11/0 seed beads looks like and here is what the 12 warp with 800 seed beads looks like and again you can see that I chose that beautiful gold color but focused more on a single color there in the center alright so those are two examples here so I'm going to be showing you a third example and honestly it's not that different from adding beads from an eighth warp as it is to a twelve warp so what I've done so far is I've taken my cords here and I've built up my thread so far so you can see in there it has a nice beautiful spiral happening already so I'm going to continue that a little bit here so what I want to do is I'm actually going to start and let me just show you where my beads are starting so I'm going to kind of kick out my bobbins here so as you learned from previous I have this main row going across here and this is going to be that main spiral so this is my gold bead here on both sides and then what's going to happen is by putting my blue beads here and my blue beads here and my white beads here and my white beads here so they're kind of separated I'm gonna get a nice sort of additional spiral happening so you're gonna see that so what I'm gonna do first is I'm gonna continue and just do a couple of wraps here just going around just building up that braid just a little bit more also so you can kind of just get used to the pattern here and again I do encourage you to watch the other video it goes through much slower to walk you through kumihimo you can also learn this by watching our eight warp it's just a couple more here I'm gonna go around one more time and then I'll kind of walk you through it a little bit slower when adding the beads alright so that is my last one there so I'm gonna rotate one more time alright so as you've been watching I've been taking this cord here and picking it up now I've grabbed one little bead and I'm gonna slide it down and what its gonna do is it's gonna catch underneath that cord in the center there so you can just see it just hiding underneath there and I know these are small beads but again this is a little bit more of an advanced technique so just make sure that your bead is being caught underneath the cord there that it's not coming on top we don't want it to look like that we want it to kind of catch underneath so you can see that I'm actually kind of poking my fingers up through there just to sort of hold it into place because kumihimo is a little bit difficult in terms of the tension you can just see that I'm just doing the same pattern just kind of sliding it down there there we go and I know the blue beads are hard to see on the blue cord there but we want to make sure that they are staying put under there so you just gotta kind of hold it and just be careful especially with this first one while you're just starting to build up those beads but again this is why it's really important to have a good handle on the 12 warp before you try adding beads and if you are adding the 800s they tend to be a little bit easier to add there's you know a little bit more of a lip for them to kind of catch on to alright so you can now see that they're all kind of just like City down in there so we're gonna keep going and every time you pick up a cord to move it you're gonna pick up one bead and then move the cord across and you want to keep good tension here you can also let it slack just a little bit if you're noticing that the tension is too much to let the beads sit underneath but don't let it go too much and you can just kind of just go slow and just kind of poke it down in there and I would recommend having a pair of maybe bent nose tweezers nearby just that way if you need to pull one of those beads out you can do so sometimes they just need a little bit of help all right so this is the whole technique guys you just kind of add a bead as you go and again if you're gonna stop and pause at one point and remember our roll of three up and one down so you know exactly where to start from when you get back so I'm gonna continue to bead a little bit because I want you to see the result that this pattern allows you and just in case you're curious when it comes to the 11o beads we found that you know depending on tension of course but about 50 beads per strand will give you about a six to a six and a half inch bracelet so if you're curious about sizing but the great thing about kumihimo is it's not like bead crochet where you kind of have to know the number of beads like right from the beginning this one will allow you to add additional beads as needed all right so I'm gonna continue to do this and I'll be right back to show you what our result is looking like all right so I'm gonna leave three up there on one of my sides and I want to show you the result that we're sort of getting down here at the bottom we're getting that nice sort of double spiral let me get some of my things either way so you can actually see so one thing that I noticed is that I do have a locked bead in there so I'm going to show you guys how to get that out so you can see that there's a little gap here and these are my bent nose tweezers here so I have a little gap of a white bead and I can see him he got locked up in there at the top now this is something that's easier to catch as you go so every you know couple of rounds just come and just check it out in the back just make sure everybody is where they're supposed to be because if there's not you know if there's less tension here at the moment you can actually get that out a little bit easier so I'm gonna go ahead and push that through to loosen up some of the tension there on the top and then I'm just gonna take my little bent nose tweezers there and just kind of finagle it in there yeah we're just gonna sort of dig out our little bead there now be careful these are glass beads you don't want to crack the bead but all you're trying to do is just move the cord out of the way now ideally you don't want this to happen but if it does this is kind of how you can salvage your piece but I definitely recommend you do it a little bit as you go come on everybody there we go alright and now I'm just sort of twisting the beads to get them to sit correctly so there you go alright now you can see that I poked a couple of beads out so what I want to do is I want to flip it back over and we're just gonna kind of adjust our tension again you can see that I have some slack on some of my cords there and keep that one down there there we go just kind of pull it down alright so now we are ready to continue and remember if you are gonna do that anytime we kind of flip it over and check make sure that you have three up on one side because you don't want to flip it back over and totally forget where you started from so you just need a little pair of tweezers and just sort of do it as you go you know it happens don't don't think that your skills aren't up to snuff sometimes just when they're rotating there and I do like to kind of keep one of my fingers down there and just kind of keep just poking it down just making sure everybody's everybody's happy down there alright so we're gonna continue here and again just making sure it slides right underneath there and I'm going to take one more bead and slide that down so let's say those are all the beads that I wanted to add now I have no more beads left on my bobbin so I'm just going to continue and rotate and do it the same just without the beads and this is gonna sort of zip up the other side so we just keep going around and around and I'm sure you know the pattern by now because I'm moving a little faster if you need to sort of review the pattern of doing a 12 or please go back and watch our video without beads the cords are all different colors and it's a little bit easier to follow this is like I said a little bit more of an advanced technique but once you get the hang of it it is really really fun alright and I'm just gonna do a couple more here so I want you guys to be able to kind of see it off of I'm gonna cut it off of the disc for you so that you can see what that looks like so I'm gonna continue to do this and I'll be right back in two seconds to show you what that looks like alright so I'm just gonna kind of come up through here and just pull this down just a little bit and then I'm just gonna release all my bobbins from the top here I'm just gonna pull this through take off my little Gator wait there and here's where you can see what we've got so you can see the unbeaten portion here it still has that really nice little tight spiral but this beaded portion has sort of a triple spiral now so you can just see the little difference here where if you use three different colors and in that pattern you can achieve this type of result there are definitely other patterns that you can do I encourage you to play around and test it out also you can tell that by using one color I chose the blue and I had blue beads so that kind of disappears into it so what you really focus on is you focus on that gold and that white spiral so just something to consider when you are deciding on your patterns but have fun it's very similar to a twerp kumihimo just a little bit more advanced so please enjoy and head over to beadaholique.com to catch all of our other videos on how to do all of our wonderful kumihimo projects you can get all of these supplies by heading over to beadaholique.com

You recently viewed

Clear recently viewed