
|
Miyuki Delica Seed Beads, 10/0 Size, Opaque Turquoise DBM0729 (8 Grams) SKU: DBM-0729 $3.90 |

|
Miyuki Delica Seed Beads, 10/0 Size, Opaque Red DBM0723 (8 Grams) SKU: DBM-0723 $4.30 |

|
Magnetic Clasps, Round 6x4.5mm, Silver Plated (4 Sets) SKU: FCL-6808 $4.35 |

|
FireLine Braided Beading Thread, 6lb Test and 0.006 Thick, Crystal Clear (50 Yards) SKU: XCR-1278 $13.99 |

|
The Beadsmith English Beading Needles Size 12 (4 pcs) SKU: XTL-3006 $3.99 |

|
The Beadsmith Extra-Fine Thread Snips - Cuts Textiles, Yarn, And More! SKU: XTL-0109 $6.65 |
Related Videos

How to Bead Weave the Scarborough Necklace with 3-Hole Cali Beads and Austrian Crystal Bicones
In this video you will learn to make the Scarborough Necklace from start to finish, using a variation of Right Angle Weave to create the beaded, wr...
View full details
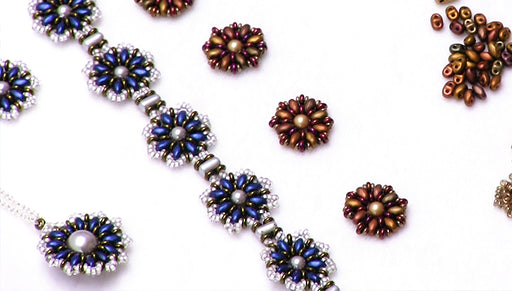
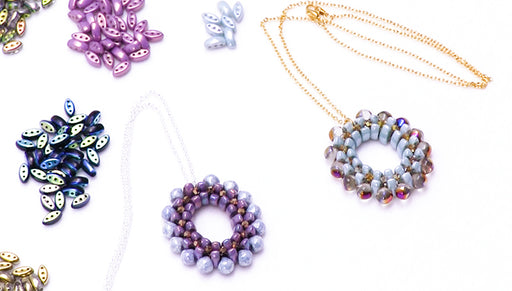
How to Make the Floraline Necklace, Earring, and Bracelet Set
In this video, you will see how to create the Floraline Necklace, Earring and Bracelet set by first constructing individual beaded flower units, th...
View full details
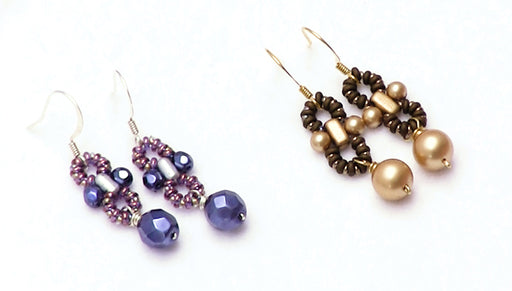
How to Make a Beaded Connector Link
In this video, you will see how to create from start to finish the Looplink Earrings in Champagne. This project features beaded connectors made of...
View full detailsCustomer Reviews
Based on 1 review
Write a review