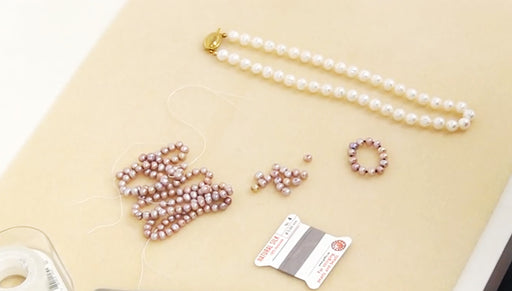
How to Make a Knotted Pearl Necklace without a Clasp

SKU VID-0486
Designer: Julie Bean
In this video tutorial, see how to make a knotted pearl necklace without a clasp. This continuous strand of pearls looks lovely and, if you are careful to make it long enough, it will slip easily over the head. In this video you will learn how to make an elegant, classic piece of jewelry.
Audio Transcript
Note: This audio transcript is auto-generated and may not be completely accurate.
Hi, this is Julie with Beadaholique.com and today I want to show you how to make a knotted pearl necklace in a continuous strand where you don't actually have a clasp. We just have a knot between each of your pearls we had a couple of requests for this so I wanted to take some time and show you actually how to do this. The more traditional way that you are probably familiar with is how to do a knotted pearl necklace with a clasp and then you have these little clam shell that go over the last knot on each end and then you can use those to attach a jump ring or attach a clasp to. So we have another video showing you how to do that but I do wanna show you how to do it without having an end point to it and just a continuous strand To begin you're going to need a pair of scissors. I'm going to show you how to pearl knotting with tweezers. I have a pair of tweezers you're going to need some tape, you need some pearls. I have two strands here that are about 15 and a half inches long each. So that is something important to keep in mind. If you are going to do this where you don't have a clasp you'll need to make a necklace long enough to slip easily over your head. So you're probably looking at least 26 or 28 inches and maybe a little bit longer than that just to be on the safe side and then I have some Griffin Silk and this a size 4 and I'm gonna go with a little bit of a thinner size which is a size four. It's not the thinnest but it is a little bit on the thin side and that's because I have to be able to go through my last pearl twice with this and that's important to keep in mind because if you're silk is thin enough to go through the pearl once but too thick to go through it twice. It's not going to work for this applications, so keep that in mind. So let's begin. Take your Griffin Silk off the card unwind it and if you're not familiar with Griffin Silk it's a really nice quality thin silk braid, silk cord and it has a needle that comes already attached. Go ahead straighten out that needle just use my fingers and then you are going to want to pre stretch your cord Mine has a little knot on the ends. I'm just gonna take my tweezers and carefully get that knot out okay so now I'm ready to begin. I'm going to start by taking a little piece of tape and putting it several inches, about five or six from my tail now the first bead that I'm going to string on is gonna be the one I have to go through twice so before I actually put it all the way onto my Griffin Silk, I'm gonna look at my pearls and you'll notice they have slightly different size holes, you can see like this one here is quite tiny this one is a little bit bigger try to pick a bigger one put it onto my needle slide it down and now I'm going to try to go back through it just to make sure that I can pass through this particular one twice and that's feeling a little challenging. I'm going to see if I can find one with a bigger hole now if you don't want to worry about this, you could pick a pretty decorative bead like a bicone bead or maybe a Beadelle Pave Crystal or something really sparkly and decorative and see if you want to use that as your first bead that you have passed through and then do the rest with the pearls. Do not skip this first step because you could end up at the very end and your necklace is not going to work right I'm not happy with that either now if you have a bead reamer you could go ahead and use it and make your hole a little bit larger but I didn't want to make you have to do that with this particular project and actually this hole looks pretty nice and big. I think we're gonna be fine there we go and that went through very easily. So just be patient try a few, make sure that you have one that works and now I'm going to slide this one all the way down to my tape and now from now on I'm not going to worry about the holes being too big because I only going to have to past through once so I'm not going to create a knot right after that pearl, I'm just gonna leave it and I'm gonna put another pearl onto my needle and slide it down. Right now I'm going to create my first knot I'm going to create a simple overhand knot pull my Griffin Silk all the way through put my tweezer through the middle of my knot and I'm going to grab the Griffin Silk right where it comes out from the beads. Now I going to let my knot side all the way down to my tweezers remove my tweezers and use them to scoot that knot down. I'll show you that a couple more times string on a pearl, slide it down make a simple overhand knot, put your tweezers through the middle of the knot and grab the silk right where it comes out from the bead. There you go remove your tweezers, scoot the knot down and add another bead this is a very traditional to do this method with pearls you can do this with all sorts of beads. A couple of advantages one it really does protect the pearls from knocking against each other and two if your necklace ever breaks lose that one pearl or that one bead the others are all gonna be knotted together So I'm going to go ahead keep adding more pearls with a knot between each and then when I get to the end I'm going to comeback and show you how to finish you're knotted pearl necklace in a continuous strand with a knot between each and no clasp. So I've gone ahead and I've knotted all my pearls. I'm going to show you, you have about an 30 inch necklace here that's going to easily slip overhead and I love, if you haven't felt knotted pearls before they feel so good. They've got a lot of flexibility to them because they're really jointed between each pearl, so they hang really nice and they drape beautifully. So I wanna show you how to finish this off without having to use a clasp so you remember I have my piece of tape at this end and I have my two pearls which are scooted together without a knot. Now before I came back on the video I ended up adding my last pearl and knotting right after it and I'm going to add one more pearl just so you can see the process alright so knot pearl, knot pearl, knot pearl and then I've got pearl, no knot pearl and the piece of tape. So I'm going to remove my piece of tape take my needle remember that important first step that we did we make sure that your needle we'll go back through this pearl a second time so there's no knot at the other end this pearl either right now, take your needle go back through that first pearl you strung gonna pull your ends together I want you to see this as clearly as possible. See what's happening you criss-crossed your two tails in the middle of that first pearl you strung and now you have 3 pearls together and they don't have a knot between them. What you're going to do with your tails now is you're going to create a knot between them so make a loop go around the pearl like so and come back through. See what I did and I'm just going to pull push that down and now I've got a knot between those two pearls and do the same thing on the other side I don't need this much thread to work with anymore so I'm gonna cut that off so I don't have to worry about it I want to create a knot on this side create my loop go around that pearl, come back through up and under and through now I'm just going to pull it pull tight. Now what you wanna do take your scissors, trim it you may want to use a little bit of a sharper point, more pointed scissor to do this just so you don't have any little tail end sticking out and then what I would recommend is I would take a little GS hypo cement and I would just put a little dab of glue right there over that knot and right there over that knot, let it dry overnight and you're gonna have a strand of pearls thats continuously knotted without a clasp Go to www.beadaholique.com to purchase beading supplies and to get design ideas!

Customer Reviews

Based on 2 reviews Write a review

You recently viewed

Clear recently viewed