How to Apply Collage Images to Nunn Design Channel Bead Cores and Make An Earring

SKU VID-0147
Designer: Julie Bean
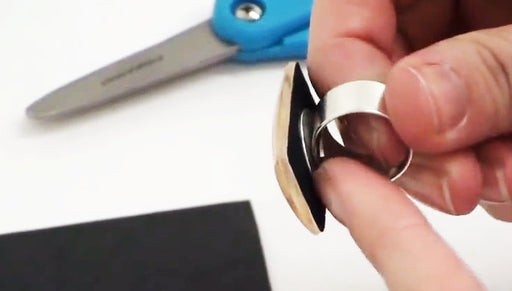
In this video, see how to apply pre-sized Nunn Design collage sheets to large-hole Nunn Design bead cores. These versatile and customizable bead cores offer a wide range of design possibilities. Also in this video, learn how to turn a bead core into a quick and easy earring.
Audio Transcript
Note: This audio transcript is auto-generated and may not be completely accurate.
Hi, this is Julie with Beadaholique.com Today I want to show you how to use Nunn Design bead cores and make a bead. Nunn Design's been very clever and they have made these wonderful large hole bead cores which you can then use either custom collage sheets which are perfectly sized for the bead cores themselves making work very easy. You can also take these and put your own image on them or actually use a two part epoxy clay as well. So there's a lot of different variations on how you can make your own customizable beads. But in this particular video I wanna show you how to apply the collage sheet images to the bead cores then I'm going to show you how to a really quick and easy earring. So what you need for the basic just applying of the images to the bead core is scissors to cut your images some Nunn Design glue to adhere the collage sheet to the bead some Nunn Design sealant to seal the bead and a paint brush to apply the sealant and the glue onto the bead itself and then subsequently the collage sheets as well. These are perfectly sized. I've got one size right here. I've got this great little tiny one right here. I even have this wonderful pendant which actually the collage sheets are sized to as well. So those are your different options. I using this medium size one. I'm going to pick one of the medium size collage sheet images. When you get these collage sheets there's actually step-by-step instructions on how to apply them. I'm not going to need those because I was telling you what to do in this video but you will have those for reference if you buy the collage sheet. So first off I'm an image I like. Now keep in mind which orientation your bead is gonna be in your jewelry piece you're going to have it like this You can have it like that consider that when you pick the image you want. I know mine is gonna be up-and-down so I want an image that will work well with that. I'm going to take this little one right here. Just to get out the sheet I rough cut it. Now I'm just gonna to cut it along the edge. Before I put any glue done I'm going to make sure it fits and it does it's fits perfect. You have two options. You can apply glue directly to the bead itself and then to go ahead and put your collage image on top of it or you can apply glue to the collage image. I like applying it to the collage image. If you've seen my other videos you know that I just like to use my fingers. I think I picked this up when I was a child and I never stopped doing it this way but a toothpick or a paint brush scrap piece of wire would work as well. Make sure you coat every edge of the collage sheet. Just going to lay it down in there. Roll it around. There's going to be a little bit of overlapping that's perfectly fine. Make sure you have plenty of glue where it overlaps. Smooth it out. I'm going to take my fingernail. Make sure that it pressed into place. The Nunn Design glue dry clear so if a little bit spills out. You might actually like that because it's going to let you know there's plenty of glue right there. I'm going to roll it gently. There we've applied our image to the bead core and I'm going to let that dry for about fifteen minutes before I go back and I seal it with a layer of Nunn Design Sealant. Now that I our glue is dry we're just going to paint a top coat of the Nunn Design sealant on it. Grab your bead by the two ends that way you're not going to touch it. A little bit of sealant onto your brush. Make sure you line up with. Make sure you coat fully the edge and just paint over the collage sheet. Rotate it without touching what you just went ahead and glued. Keep rotating. Once you've painted the entire surface, set it down and let it dry upright for another ten to fifteen minutes and then I'm going to how to take this piece and turn into an earring. Now that my bead core is dry i can work with it again. I'm going to show you how to make it really simple pair of earrings using one of these bead cores. So I've got a two inch ball head pin. I've got some little Swarovski four millimeter bicones and some of the six millimeter Swarovski round beads. So what I'm going to take my head pin put one bicone on it one round. Now I wanna make sure that I have the bead core facing the direction I want. You can tell that butterflies are in an upright position. Make sure it stays that way. I'm going to add another round another bicone. Now you can tell that their little is in there right now to solve that I'm going to make sure that that round sits down within the well of the bead core and I'm going to take my wire looping pliers. So I'm holding this tight so all the beads are snug. Put my wire looping pliers up against the edge of that bicone. There you go. Make a wrapped wire loop. Take my flush cutters trim off that wire tail take my pliers and finish this off by pressing that tail into the wrapping. I'm going to twists my bead so that the butterfly is front and center make sure everything is in alignment. Now all I have to do is add my earring hook open the loop at the base of the earring hook just the same way you would open a jump ring. Attach it to my wrapped wire loop and close it back up. To make your other matching earring you can either purchase another collage sheet or just use one of the other images that has similar colors in it. So you can see that took no time at all. I have a very pretty and very easy earring which I made using the Nunn Design bead cores and the collage sheets to match. Go to Beadaholique.com for all of your beading supply needs!

You recently viewed

Clear recently viewed