Audio Transcript
Note: This audio transcript is auto-generated and may not be completely accurate.
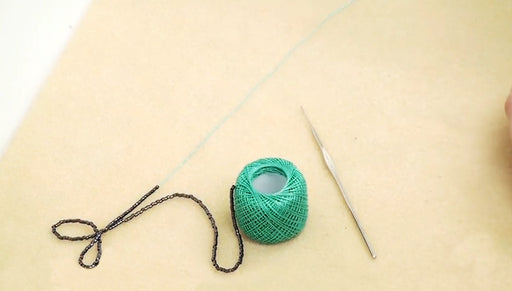
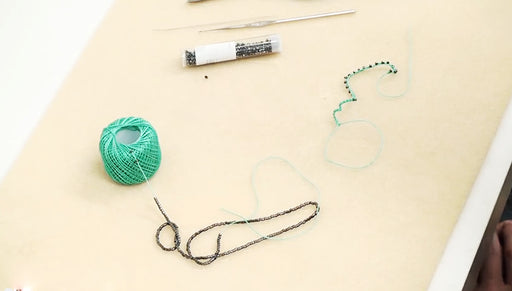
Hi, this is Julie with beadaholique.com and today I show you how to crochet around a loop earring it's a really fun technique. It's pretty easy to do as well I have my sample piece here and as you can tell it's not a finished earrings. I'm showing several different techniques and I'll show you how to do this edge right here. I want to show you what would happen if you increased the chain stitches and then you get these bigger loops and I wanna show you how to add beads to it as well. We're going to cover several different techniques and what we're gonna need to start is some pearl cotton or whatever textile you like. What you are comfortable with. I've preloaded some beads onto it the beauty about working off the spool is you don't need to pre-cut your measured piece. You can just keep adding to it but what you need to do is preload all the beads you think you're going to use and this is way more beads that we're going to need for this project but they're already loaded on here and what you'll do is you just keep scooting them down further and further until you need them. That's really easy to do then you're also going to need a crochet hook I've got a size 6 hook. You're going to need a wide eye needle. It has to be wide enough and easy enough for you to actually get the pearl cotton through. You're going to need some hoop earrings and a pair of scissors and then for this particular project a beading hoop earring. So as you can see as these are right now it's not possible for them to lock in place there's no way for them to do so. So all you need to do is actually turn these into a functioning hoop earring. Now traditionally you put beads on it first and then you just take a pair of chain nose pliers, bend up that tip and suddenly your earring will lock into place so that's all you need to do for that so if you're earring already comes with that bent up you're not going to need to do that for this project so I wanna show you how to start. So we're gonna begin by making a slip knot and we wanna leave a tail that's going to be long enough to go back and thread through our wide eye needle say about eight inches'. To make a slip knot you just do that by creating a loop and pushing your thread through it but not all the way. You want to make it like so and then they're gonna be able to pull it and adjust it I'll show you that one more time. So we're gonna make a loop going through and push your thread through it but not pull the tail through and pull and that's gonna make a slip knot. After you've done that go ahead put your crochet hook through the slipknot and tighten it around the neck of the hook Position your fingers, take your thread, put it between your pinky and the finger next to it, wind it around go across the palm of your hand, between your index finger and your middle finger, coming out so you pinch it between your middle finger and your thumb and hold it like so I'll show that one more time really quick now you're ready to begin and you can choose whichever side you want to start on what we're going to do is you're going to position it so that the pearl cotton is actually inside of the hoop and your needle is on your side and then the thread is coming up the back So to begin we're going to just go ahead loop under the pearl cotton and pull through your slip knot now to make the next stitch we're going to you'll need to adjust here and there just because it's a little tricky when your first starting to hold this loop and make sure you have the right thread tension. Now I'm actually gonna dip under the loop, catch our thread, pull it to the top. Now we've got two loops go under the pearl cotton again we're gonna go through both loops. Repeat the same process again. I'm going under the loop, I'm catching the thread I've got two loops now on the neck of the crochet hook go under my thread and pull through both of the loops. We're going to repeat this. So under the hoop. We have two loop on your hook. Loop your thread again and pull through. See this is adjustable so you can go ahead and adjust that tension if need be and as your doing this if you don't have a stopper right here, if it's not curved up or molded so it's a stopping point, make sure you keep an eye on this so it doesn't slip all the way off of your loop and at the end you might want to put a little bit of glue in there just to make sure that it stays in place so I'm dipping under and grabbing that thread and pulling it to the top. I've got two loops on mt hook I'm going to dip under and pull through. Keep repeating this I want to show you what we've got at this point and pull this out a little bit just so I don't lose it. Here is what we're starting to get it is nice and even. Now it does twist which is fine. You just twist it up to the topside and then it can also at this point move along the hoop as well. So you can do some adjusting as you go whatever works easiest for you and I'm gonna pull that tension back again, rethread my fingers under the hoop, catch the thread pull it to the top, you have two loops now, go under the thread and pull through both loops So now I'm just gonna continue until I go all the way around my hoop As you can see I finished crocheting around the hoop and you can see there's little gaps of the silver showing if you want you can just scoot the crochet together take my hook off. If you're going to take your hook off for a moment make sure you just pull that loop a little further so it doesn't come undone and then if you want you can scoot your crochet around on the hoop to make it a little tighter there we go and now you can't see that silver if that's the look you're going for and then you just finish crocheting a little bit more and this is actually a very nice look you could leave your project like that and call it done but I do wanna show you how to do the little edging and then add the beads to the edging as well. I like my crochet a little bit more spread out. I didn't mind the silver so much I'll do a couple more little loops and then I'll show you how to do that edge I'll put it in the loop. It can be a little bit hard when you get to the end to keep it on the loop and to prevent the thread from slipping so I'm actually going to pull my crochet together again a little bit so I have a little bit more of the loop to catch under. I'll put my hook through and I'll do the same process loop under, pull it to the top I'm actually holding on to the end of the hoop right now so that this stays on it and doesn't slip off. Do one more loop under, pull it through to the top and pull it through both loops and I'll spread it out a little bit more because I actually like it not quite as tight and I'll do the edging. To do the edging I'm going to chain stitch four. 1, 2, 3 and 4 and I'm going to turn my piece realign the thread on my hand and now I'm going to skip one stitch and I'm gonna go through the second one. The way you're gonna count these. It can be a little bit hard to see, here's going to be one, here's gonna be two, go under both of the loops. You'll get the hang of this if you're not familiar with crocheting this will make sense. Sometimes it helps if you actually just go ahead and you hold your crochet, your chain stitch. It can be tough when you're working on this scale pull it through. Now I'm going to have two loops to go through go through two so that is our first little edge chain stitch four and repeat the same process. I'm gonna skip one so there's one and then go through two I caught my needle under there, catch my thread pull it through two loops on my hook. I'm going to my catch thread and pull it through two now you can chain stitch four, you can chain stitch 3, you can chain stitch 8, you can do whatever you want. You can see we have different sizes here. It's basically whatever esthetic you're going for now if you do want to add beads I suggest you pick an number to chain stitch. I'm going to do 3. You see how we do this Chain stitch one before I do the second one I'm take a bead, scoot it down on my thread If you've seen our video on how to chain stitch with beads it's the same process. I'm going to line that bead up against my completed chain stitches I'm going to go over that bead and I take my hook, loop my thread and chain stitch I've just caught that bead now. I'll do another chain stitch and that is now trapped now I'm gonna go down and just skip one stitch go through the second one. Make sure I get under both, pull through I've got two loops and this is a single crochet stitch that I'm doing right now and pull through both loops now chain stitch one, add another bead, scoot it all the way down make sure I go over it with my needle loop my thread, chain stitch and chain stitch one more. We're going to again, skip this one, go through the next one, I just missed it, make sure I put this back on and I'll do this for just a little bit so you can see the process there we've got some beads on. I'll show you what it looks like so we've got nice loops with beads and again you can make them whatever size you want. Now how do you do this What you would do is if you've gone all the way to the end. Work your way around. I'll pretend we're at the end right here instead of doing more chain stitches I'm just gonna go through into a single crochet on the one next to it so it has just a little bit more of a tapered feel and then I'm gonna pull my loop larger, going to snip off a tail of about 8-9 inches and I'm just going to put the tail through my loop and pull and I'm going to take my needle put it through there that's why you wanna leave a tail which is a good enough size and I'm just going to take my needle and work my tail into my crochet they're we just tacked down that end very nicely. You wanna be discreet about it. You want a big lump anywhere once you've woven it back in for between a quarter of an inch and a half an inch, you can then go ahead and snip it off that's a nice finished edge for you and then you'll do the same thing with the tail you started with take your big eye needle, put the tail through we'll do the same process. Go ahead and stitch our pearl cotton into your crochet work that we've already done I'm just going In and Out very discreetly and snip it off Our ends are taking care of. You've been able to go ahead crochet a beaded edge and then like I mentioned before if you want you can just stop after you've done the crochet around the hoop itself or you can do the decorative edge. Go to www.beadaholique.com to purchase beading supplies and to get design ideas!