
|
NYMO Nylon Beading Thread Size B for Delica Beads "Black" 72YD (66 Meters) SKU: XCR-8932 $2.79 |

|
Toho Bugle Tube Beads Size #1 / 2x3mm Opaque Turquoise 8 Grams SKU: JSB-0037 $1.99 |

|
Miyuki Delica Seed Beads, 10/0 Size, Matte Cream DBM0352 (8 Grams) SKU: DBM-0352 $5.85 |

|
Miyuki Delica Seed Beads, 15/0 Size, Matte Cream DBS352 (4 Grams) SKU: DBS-0352 $4.89 |

|
Miyuki Delica Seed Beads, 10/0 Size, Opaque Red DBM0723 (8 Grams) SKU: DBM-0723 $4.30 |

|
Miyuki Delica Seed Beads, 10/0 Size, Opaque Turquoise DBM0729 (8 Grams) SKU: DBM-0729 $3.90 |
Related Videos

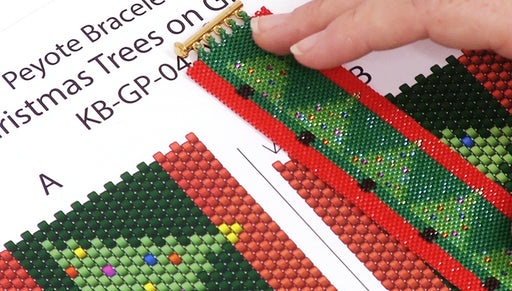
How to Read a Peyote Pattern Bead Chart
In this video, you will learn how to read peyote patterns simply and easily. Update: The kit shown in this video is no longer available. We have in...
View full details
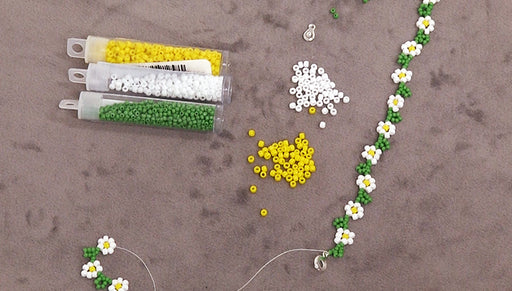
How to Make a Daisy Chain Bracelet
In this video learn how to bead weave a classic daisy chain bracelet. This project is quick and easy.
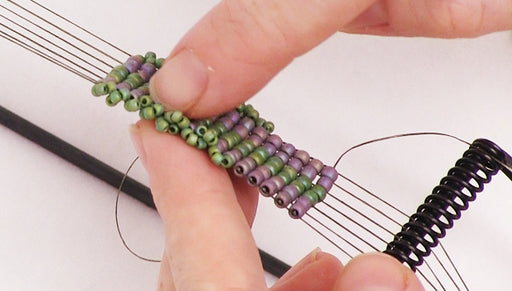
How to Add a Beaded Edge to Loom Work
A fun variation to traditional loom work, this video demonstrates how to add a ruffled beaded edge.