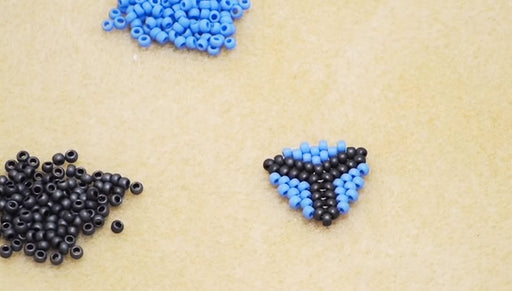
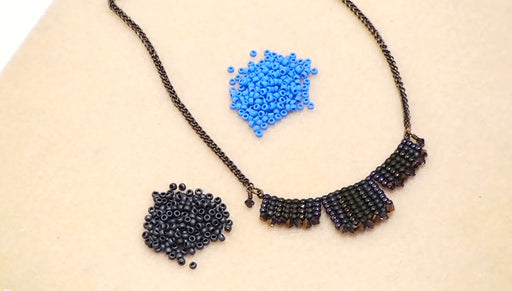
How to Multiple-Bead Right Angle Weave

SKU VID-0064
Designer: Julie Bean
Expand your bead weaving skills and learn how to multiple-bead right angle weave. You will be replacing the single beads in the traditional stitch with multiple beads, making your units are larger. Your bead weaving will take on a whole new look with this easy expansion.
Audio Transcript
Note: This audio transcript is auto-generated and may not be completely accurate.
Hi. This is Julie with Beadaholique.com and today I'm going to how to do a flat right angle weave in bead weaving using multiple beads. Andrea, my fellow designer here at Beadaholique.com has already done a great video showing you how to do the traditional flat right angle weave. That looks a lot like this. It's probably what you're most familiar with and then in this particular necklace what I did was I started adding more beads as I went. Let me show you how to do that. So I want to start by just doing the traditional right angle weave. So you're gonna need four beads onto your needle. I'm just going to pull those down. The length of the thread is determined upon how long of a project you have how big of a project. You're going to this down till you have about a tail of about six to eight inches. Now I'm going to go back through the first bead I strung and I'm going to pull that. You can see what we've done. We've just created a little fourlette Now what I want to do is I want to go through this second bead I strung and also the third and come back out. Now I'm going to string on three more beads because I've got a fourth bead already strong on there. That's going to be my forth bead. I'm gonna come back up through it. Again through the next two beads and then I'm going to do one more and then I'm going to show you haw to do multiple beads. So I pick up three more beads go back through that bead which was my starting bead so you can call that my first or my forth depending on how you look at it. Go back through the two beads next to it and back out. You can see we're forming a pattern. They almost look like little flowers. So that is a traditional flat right angle weave. Now I want to add some multiple beads. So instead of just doing three beads I'm gonna go ahead and do one bead here and then add a little bit of a larger bead to add a little bit more interest. Now I'm going to add three beads one more larger beads and finally add one more of my seed beads and you're going to see why in one moment. I'm going to take all of that and then go back through that original bead. You notice that I'm going in that direction that my thread is coming out here. It's looping around and my needle now is sticking out in the same direction that thread was originally. Pull that around. I hopefully you can see why I did the one, a large one then three of the seed beads, a large one and then one of the seed beads so that I have a balance. I'm going to come back and go through four beads. I'm going to lay it flat so I can take a look at it. I have my anchor bead which is joining my other cluster. Than I've got an archway of three seed beads another anchor and an archway of seed beads and that's why I strung the three beads in between the two large ones. Let me show you that again. So we've got one bead, a larger bead, three of the seed beads, another large bead, another seed bead and I'm going to go my needle is going to go come out the same direction our thread was originally. Pull that. Form a loop. Go back through four beads and pull out. Just do a couple more And there you go. You'll just continue on like that until you have as much a length that you want. Then you can also loop back around and create a second row. You can do that the same way as you would the more traditional flat right angle weave. Which is like I mentioned before there's a great video on done by Andrea. Go to Beadaholique.com for all of your beading supplies needs!

You recently viewed

Clear recently viewed