Resin 101: Tips and Tricks for Creating Resin Mixed Media Jewelry

Learn about using resin, an exciting and versatile medium, in your jewelry making with our free tutorials and instructional videos, then pick up some mixed media supplies and try this fun and rewarding technique yourself.
Getting Started Working with Resin
Resin allows you to create custom, one-one-of-a-kind components for your jewelry projects that will set your work apart and give you a signature look all your own. It is a liquid plastic commonly used in mixed media jewelry projects. It can be poured into molds, used to fill bezels, applied to other components to create an enamel-like surface, and much more. Resin is poured wet and then "cured" to make clear hard shapes or surfaces. Though many types of resin are available on the market, the two main types used for jewelry making are 2-part epoxy resin and UV resin (sometimes also called 1-part resin). 2-part resin consists of two different solutions, which are mixed in equal parts and cure to a clear solid after being left to harden for up to 3 days. UV resin is applied in thinner layers and remains wet until being exposed to UV light, either bright sunlight or under a UV lamp. Resin can be used to seal collages and embed items in metal bezels, to cast shapes in molds, and to create an enameled look on jewelry. Because of the variables that affect resin’s curing process, it takes a little practice to get the best results. Resin will reward your patience—it's a versatile material that can allow for a lot of creativity.
Resin Jewelry Instructional Videos
Watch these two featured videos for an introduction to working with two very different types of resin.
Featured Video: How to use ICE Resin
Featured Video: How to Customize a Purse Hanger with UV Resin
Nunn Design resin is a great alternative to the ICE Resin brand and is used the same way.
More resin jewelry videos:
- Beadaholique Live Class: Resin 101
- How to Add Opaque Pigments to 2-Part Resin by Becky Nunn
- How to Apply Resin to Objects with Uneven Backs and Stamping Blanks
- How to Embed an Eye Pin Bail Into a Resin Mold
- How to Fill an Open-Back Bezel with Resin
Resin Jewelry Project Tutorials
Find design inspiration with our free beading projects using resin.
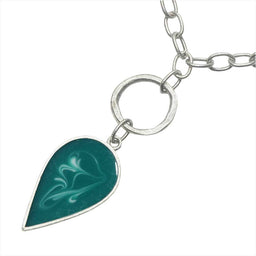 Jade Pool Necklace |
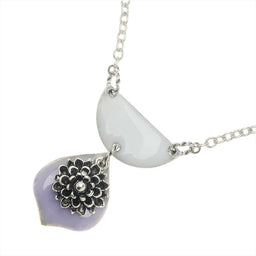 Moroccan Mum Necklace |
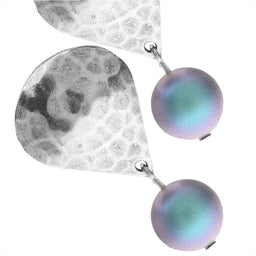
 Retired Starlit Rose Earrings |
 Snow Day Necklace |
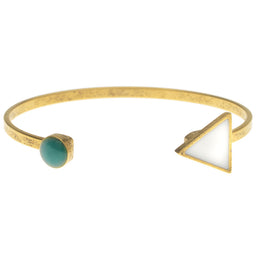 Spartan Cuff |
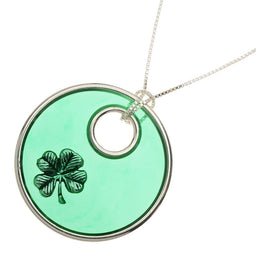 Shamrock Stained Glass Window Pendant Necklace |
 Rain Storm Earrings |
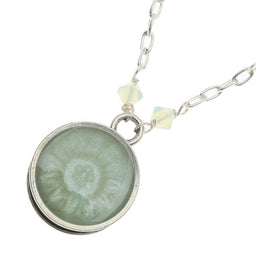 Mint Sprig Necklace |
VIEW ALL RESIN PROJECT TUTORIALS
Product Recommendations
Find recommended products perfect for creating your own mixed media resin projects. Choose between 2-part resin and UV resin, pick up some mixing supplies and find molds and bezels for pouring. Color your resin with dyes and pigments, embed stampings and embellishments, or use art glazes to prep collage artwork for the background of a resin pour. Add some sparkle to your mixed media creations with glitter and mica powder.
- Mixed Media Jewelry: Spotlight on Resin - Designer Curated Collection
- 2-Part Epoxy Resins
- UV Resins
- Glazes
- Resin Dyes and Pigments
- Resin Mixing Supplies
- Collage Artwork
- Bezel & Resin Pendants
- Resin Molds
- Stamping Embellishments
- Glitter and Mica Powder
Designer Tips
There are many different approaches and techniques for working with resin. This list of tips is composed of tricks that our expert designers have found work for them. There are many "right" ways to use resin beyond this list, but we hope that this information will help you trouble spot some common issues and work through them. Resin can be a tricky medium, so be patient and keep at it!
- When should you use 2-part epoxy resin versus UV resin? It depends on the project! UV resin cures more quickly than 2-part resin, but requires application in multiple thin layers, which must be cured under UV light or sunlight before applying the next layer. Therefore, we find it's best to use for filling shallow bezels. 2-part epoxy is a bit more versatile; though it takes up to 3 days to fully cure, it can be poured into deeper bezels or molds, and can also be tinted with pigments and inks.
- Set up a clean area to for your pouring space before you begin, that won't be disturbed by children or animals. UV resin will require a UV lamp or a window with ample sunlight in order to cure, while 2-part resin should be poured in an area where you can cover the pieces to keep them free of dust for a few days. You shouldn't move either type of resin much once it's been poured, but if you must relocate your pieces, it's helpful to have your work set up on a piece of cardboard, which can keep your pieces level as you move them.
- Always use recommended manufacturer safety precautions. Work in a well-ventilated space and wear gloves to protect your skin when working with resin.
- When collaging, glue your image down with white glue, and once the glue has dried, seal it to prevent resin from discoloring your images. We recommend **Nunn Design Sealant**—be sure to seal it with at least three coats, and let it dry completely before adding resin, or you could end up with bleeding or uneven coloration. If you are printing your own images, it’s best to print on card stock; use 65lb matte finish paper printed with an inkjet printer.
- Be careful to ensure that 2-part resin is mixed in equal quantities. When working with 2-part epoxy resin, be sure to measure your two parts very carefully. If the ratio is not equal, the resin may not set and cure properly, leaving you with rubbery pieces or even a pour that never dries. Adding pigments can also throw off this ratio, so a few drops is all you need. Never mix less than 1/2oz, as there needs to be at least this much for the chemical reaction to take place. Mixed 2-part resin cannot be stored, so it’s a good idea to have several different projects ready to pour at the same time.
- The chemical reaction that allows resin to cure is sensitive to temperature and humidity. Keep the pour area around 78*F, when pouring and when curing. For best results, do not work with resin when there is extremely high humidity. Also, if your resin was stored in a cool place, warm the bottles up to room temperature in a warm bowl of water before mixing. If it's too cold your resin can end up cloudy.
- When using a mold, use a mold release spray. This makes it easier to release your cured resin casting from the mold.
- Removing bubbles from resin is a constant process. When mixing 2-part resin, stir for two minutes until all striations are gone. Then, let it set for about 5 minutes and most of the bubbles will rise to the surface and pop on their own. Do not over mix your resin or it will be too bubbly, and those bubbles will be frozen forever in your jewelry piece! Check your pieces regularly for bubbles as they dry; larger bubbles can be popped with a straight pin. Small bubbles can be removed with heat; quickly pass a BBQ lighter over the surface, taking care not to burn your piece. Vibration also helps to bring bubbles to the surface. If you are working with UV resin, remove all bubbles before you put your piece under a UV lamp, as the piece should not be removed or disturbed once curing begins.
- Drip—don’t pour—from the inside out. Unless you're filling a particularly large area, it's best to drip your resin onto your piece a little at a time using a popsicle stick or other applicator. To get resin to the edge of your piece, use your applicator to "push" resin from the inside out, rather than trying to pour close to the edge and risking spilling outside of your setting.
- Most resin has a shelf life of about 12 months. Resin which has turned will appear much more yellow in its unmixed state and the resulting pieces will usually be flexible or maintain that yellowed look.
- Be patient with curing time. You can start to work with poured 2-part resin components after about 24 hours, but you should allow 3 days to allow it to really cure. For UV resin, it takes about 15-20 minutes to cure each layer under a UV lamp, and a few hours to cure in direct sunlight. Cured resin can be sanded, filed, and drilled.