How to Bead Weave Circular Brick Stitch Around a Ring

SKU VID-0102
Designer: Julie Bean
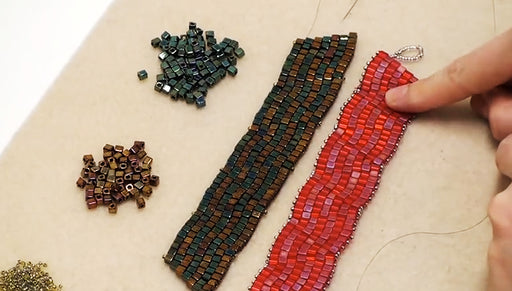
This video shows another application for the bead weaving technique circular brick stitch where you can use a link, ring, or chain segment as the foundation instead of a bead or just the seed beads themselves. Make bracelets, earrings, and necklaces with this technique. A good technique for someone relatively new to bead weaving.
Audio Transcript
Note: This audio transcript is auto-generated and may not be completely accurate.
Hi, this is Julie with Beadaholique.com ended a one show you how to do circular brick stitch around a ring. In past videos we've shown you how to do circular brick stitch and circular brick stitch around a bead and here's another variation where you take a ring or in this case I'm going to demonstrate on a link in a chain which is essentially just a bunch of rings connected together. How to do circular brick stitch around that and here's a bracelet which is almost done. I have the last ring to do. I'm going to do that in this video. One thing to note is if you're going to be using like a chain or some kind of that has a texture to it where it's got a ripple effect, you'll see that there's like a little bit of a ruffled edge here that means that your brick stitch when you finish it is gonna have a bit of a rippled effect as well whereas if you choose a flat ring that's smooth all the way around it's gonna go ahead and have a much smoother appearance. So keep that in mind when you choosing what you're going to do. These are quick links. They would be great for this application but I do want to show you how to do it on a chain. So what you're going to need is some beads. For this particular project I have size 11/0 Tohos and than I have some czech glass seed beads in size 8/0. I got myself a size ten beading needle, some wildfire thread, a thread zapper and a pair of scissors. So I've already cut myself about three feet of the wildfire thread and to begin all you're going to need to is go ahead and tie your thread on to the ring itself. Leave a tail of about five or six inches. The amount of thread you cut is going to depend on how many rounds you wanna make. So for what I'm gonna do I only need about three feet. If you're gonna do you four or five rounds you're going to need more than that or you can add in thread later. So I'm just gonna make a simple knot first and then I'm going to go back and do a surgeons knot. Going through twice instead of once pull that down and pull snug. That's going to secure that on there. Now I'm going to thread on my needle. A quick tip here sometimes if your thread is a little too thick to go through your needle or has difficulty doing it take your fingernail and run it along the wildfire or the fire line thread and that's going to flatten that a little bit. This makes it much easier to thread the needle. There we go. So now hold your chain if you're doing a chain, hold the chain in your hand along with the tail to keep that out of the way. Go ahead and pick up two beads to begin with. One. Two. Place that on your needle pull it all the way down until it's resting onto your ring. And now we're gonna go behind the ring and under pull the thread through but keep those beads on top of the ring. And now we're gonna go back up through the second bead strung and pull that. Now we're just gonna go ahead and grab one bead pull that down go back behind and under your ring. You're basically going through your ring. You want to make sure that that bead stays on the top side and go up through it grab another bead again behind under and through the ring keeping that bead up top and go up through the bead and pull You notice what is happening now is you're actually creating a thread bridge between each of the beads and what you're going to do is when you do your second row you're going to be using that thread bridge to secure your second layer. So go ahead keep repeating the same step grabbing a bead securing it to the ring, making sure it stays on top until you've gone all the way around the ring and then I'll show you how to jump up to your second row. After you've beaded all the way around your ring and you get close to your starting point you have to make a decision. If you're going to have enough room to place another bead between the last bead you strung and the first bead you strung or if you're going to have to try to close that gap a little bit. You can see here's a good example. There's just not quite enough room for another bead. I'm going to put one on there. You're going to see what happens. If I try to put this last bead on here you'll see what happens. There's not enough room. If starts to bunch up and just is not going to look right. I'm going to take that off. So what you're going to need to do is try to close that gap as best as you can. You're going to do that by going ahead placing your needle through the top of the first bead that you strung and then back up and under. You're not going around the actual ring. You're just going up and under the actual bead that you strung last. You're creating a nice loop and pull that tight. By pulling that tight you're actually bringing those beads a little bit more together and that gap isn't quite as apparent. After you've done that you're actually ready to step up to your next level and I like to turn my ring around and that's because this here is a little bit looser Where as this thread bridge is going to be tighter. I go-ahead I rotate. Turn my ring around and now I'm gonna start my second row. I'm going to start it the same way I did in my first. I'm gonna pick up two beads on to my needle pull them all the way down. I'm going to go under the thread bridge between the next two bottom row beads pull it tight I'm going to go up and under now the second bead I strung. And now I'm gonna pick up another bead just one got under the next thread bridge go up and under that same bead and pull tight. Now if you remember when you were doing circular brick stitch around a bead if you happen to watch that video you sometimes have to make a decision specially going from a larger bead to a smaller bead if you're gonna go every thread bridge or if you going to sometimes have it where there's two beads per thread bridge. There's no real rule for this. You're not going to just be doing one bead per thread bridges. It's going to create too large of a gap between your beads so you're just gonna have to make a decision. Here was a thread bridge I just went through for this bead here. I'm actually going to go through that same thread bridge again. So I'm going to pickup a bead go under that thread bridge up through that bead again. And now you'll see that my beads are nice and tight together. Now I'm gonna do another bead pick it up go under the thread bridge a new one this time and up and under through. Now I have to make a decision do I go back through this same thread bridge or do I go through the next one right here. Go through the next one You're going to have to make a judgment call. So under back up through and do this all the way around until you've completed you're circle again. You can either tie off you thread or you can jump up to a third level. And that is how you do circular brick stitch around a ring or in this case a chain. Go to Beadaholique.com for all of your beading supply needs!

You recently viewed

Clear recently viewed