
|
Kraft Brown Square Cardboard Jewelry Boxes 3.5 x 3.5 x 1 Inches (16 pcs) SKU: ZDI-6307 $11.99 |

|
Natural Hemp Twine Bead Cord 1mm Three Color Assorted Variety Pack - 29.5 Feet Each SKU: XCR-3538 $6.59 |

|
Tsukineko StazOn Acid Free Jet Black Color Solvent Ink Pad For Rubber Stamps, 1 Ink Pad SKU: TSM-100 $14.99 |

|
Kraft Brown Cardboard Jewelry Boxes 8 x 2 x 1 Inches (16 pcs) SKU: ZDI-6308 $13.49 |
Related Videos

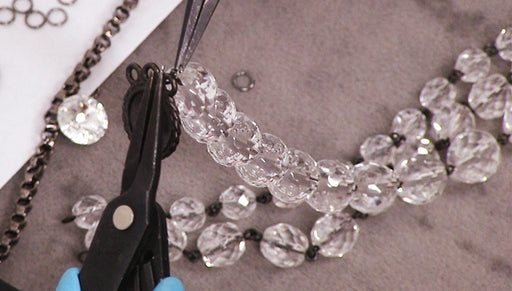
How to Make the Multi-Strand Crystal Elegance Necklace
This necklace features three strands of Czech glass bead link chain that drapes prettily available on Austrian crystals rivolis.The brand name for ...
View full details
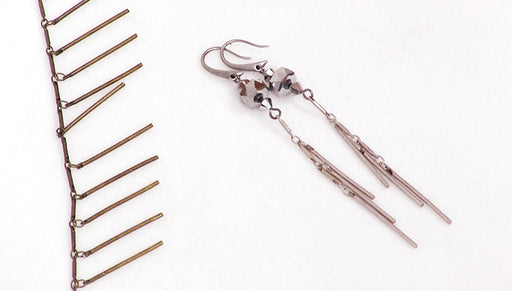
How to Use Bar Dangle Chain to Make the Chrome Comet Earrings
Using bar dangle chain you can create a wide variety of jewelry projects including these fun space-themed earrings.

How to Make a Personalized Message Necklace
Create personalized jewelry by wire wrapping message beads onto an open frame pendant. These necklaces make excellent gifts.