How to Fill Open Frame Pendants with Colorized Resin and Metal Stampings by Becky Nunn

SKU VID-1025
Designer: Becky Nunn
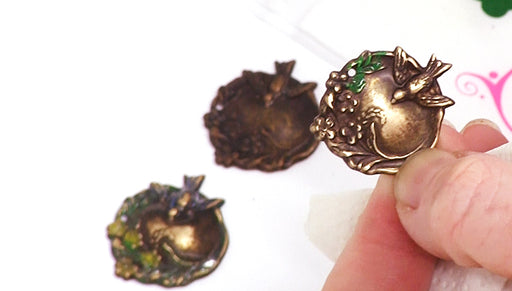
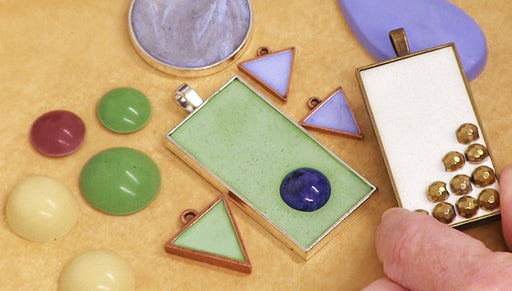
Create a striking focal by filling an open back bezel pendant with 2 layers of resin and embedding a metal stamping in the middle. Also shown in the video is how to add pigment to 2-part resin. This video features Beadaholique guest designer Becky Nunn of Nunn Designs.
Audio Transcript
Note: This audio transcript is auto-generated and may not be completely accurate.
hi this is becky nunn with nunn design and i'm shooting on location today happy Dalek in this episode I'd like to show you how you can use the open frame pendants with the colorized resin to create fun little pieces like you're seeing here what you will need are a couple over the open frame pendants a couple of brass stampings you'll also need some tape some crafting casts color pigment some two-part resin I've already mixed mine and it's ready to go a couple extra cups business cards stir sticks and some scissors to cut the tape the open frames are rim metal piece like this and it hasn't opened back and in order to allow the resin to stay in position we're going to put some tape on the back side I'm using a Uline tape it's a packing tape and this tends to be a lot thicker in weight and I tend to like that because it just is very firm when I'm using it for the back pieces so you're gonna want to go ahead and cut off a small piece of the tape lay it down onto your surface and then press your open back puzzle onto that tape and once you have it into position just go ahead and just move it back and forth on your table and burnish it down and that's making sure that you have a nice easy and even contact all the way around another thing that I like to do is once I have my piece I like to trim away that extra tape because it's super easy for that to get snagged on things and the last thing you want is for this to be moving around once you have that resin filled in there so just trim off the excess pieces on the side and you'll have a nice piece like that to work with the next step is we're going to want to colorize our resin and then that piece the pieces that you were seeing I used black so with my mixed resin I'm not going to want to pour that colorant into that and colorize that whole batch because I could use this for other projects so I'm going to go ahead and pour just a tiny bit off into an extra cup and you're gonna see just how little you need to add of this pigment I'm just squeezing a tiny bit out and I'm just putting a little bit on to the tip of my toothpick that small amount will colorize that batch or resin and I always want to under apply it so it's much easier to keep on adding to the resin than it is to have too much colorant in there so depending on how thick that you want your black to be and in this case we're going to go for a very black opaque resin you just going to keep on adding a little bit more of the pigment different colors you need less so it's always a great discipline to be in to just tiny tiny amounts just tiny amounts at a time the ratio for this colorant to the resin is you don't want it to be more than 10% of the colorant to the resin because then the piece will have a hard time curing so once you have your resin the color that you would like and this is kind of a more of a charcoal color not my way you kind of fun so let's try this out you're gonna want to take a stir stick or if you have a popsicle stick and you're just gonna scoop up some of your resin and pour it right inside of the bezels but before I do that I'm gonna go ahead and take a business card because it's gonna be much easier for me to move that resin around while it's on a business card than if it was just on a piece like it was on the table then go ahead and drizzle your resin right into the bezel and you're just going to want to have a thin coat in the base of the piece so now you can see why it's nice to have that area all trimmed off because it's easier to manage this and just go ahead and move your resin around and if you don't like a charcoal look like this you just add a little bit more pigment to it but this is going to be kind of interesting because it's going to be kind of translucent if you're concerned about getting that resin onto the sides go ahead and use a smaller toothpick and just slowly move it around and you just want to make it make sure that it gets to all of those little corners and then you're going to need to let that sit for about six hours or so until it's firm enough so that we can lay those embellishments into it without the embellishments sinking to the bottom after you've had some time for your resin to cure about six hours to 12 hours depending on the humidity and how warm it is your piece should be tacky enough that you can place your embellishments into the resin and not have it sink to the bottom so I'm just positioning my piece right into my open frame and I have already mixed some two-part resin and I'm ready to drizzle over the top my clear so it's easiest to just slowly drizzle some in and add to it as needed versus dumping way too much and having to clean it up then with a toothpick or a headpin you might want to take a closer look just to make sure that you don't have any air bubbles inside of there and sometimes I might go in there and kind of just go along those edges just to make sure that there's not any air pockets so here's some other little pieces that you can add into your other little embellishments into your other little frames just placing them gently in and then with your toothpick just moving them gently around so my resin is not cured but it is hard enough so that those pieces don't sink to the bottom and then you just continue to drizzle a tiny little bit onto the surface so these pieces that I'm creating are a little bit different than the original piece that we were going for but these are fun too they're kind of translucent with that gray background giving them a fun look on this piece here after we were done you peel away the tape and you might have a little bit of residue like this on the back and you can use your finger to remove it and kind of ball up that you can use a little bit of a wet wipe or take some fingernail polish remover and remove the tape then get all of the gumminess off of the back but then your piece will look like this on this one it'll look slightly different because this is more of a translucent gray and this is a black whatever you do is going to come out great this is becky nunn with nunn design shooting on location at beadaholique you how to use an open frame with a bit of tape on the back how to colorize resin and put in metal stampings thanks for joining me you

You recently viewed

Clear recently viewed