Learn how to make a wrapped wire loop with our instructional video tutorial or see below for written instructions and step-by-step photos. Knowing how to create a wrapped wire loop is essential for beading and jewelry-making.
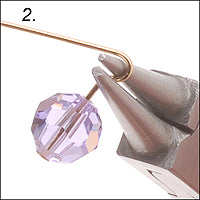
Place your bead(s) onto a head pin. Right after the bead, grab the head pin with your chain nose pliers and bend the wire at a 90-degree angle above the pliers. This creates a small upright piece of wire between the bead and the bend. One of our favorite chain nose pliers is the Beadsmith Jeweller's Micro Pliers.
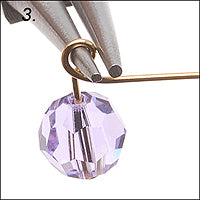
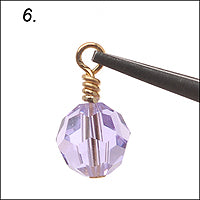
Reposition your round nose pliers to make it easier to loop the wire all the way around the nose, creating a complete loop.
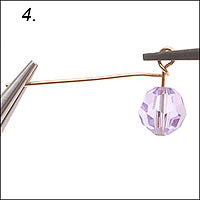
Remove your round nose pliers and grasp the top of the loop with your chain nose pliers. Using either your fingers or another pair of pliers, grip the end of the wire and coil it tightly around the upright piece of wire below your loop, coiling from top to bottom. Keep coiling until your reach the top of your bead.
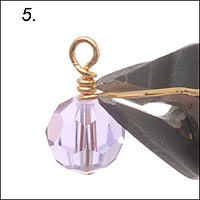
Where the wire coil tail meets the bead, snip off the excess wire end with your wire cutters.
Use chain nose pliers to tuck the end of the wire into your wrappings.