Audio Transcript
Note: This audio transcript is auto-generated and may not be completely accurate.
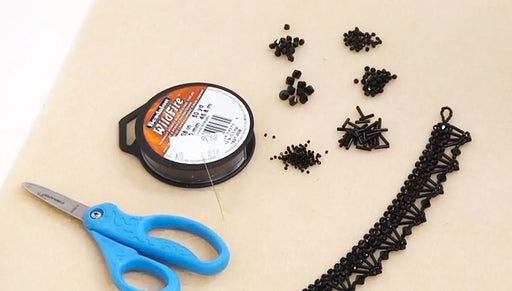
Hi, this is Julie with beadaholique.com and I want to show you how to wire wrap and do this like mesh netting using wire on a bottle. So these are fun. Bottles come in a bunch of different sizes. You can see here I've three sizes and I've just taken the little one and I have wire wrapped it using some 18 gauge wire right around the top of it to form my anchor. I've these little hooks that you can then attach a chain to and I've used 28 gauge wire to make a netting which I've actually have taken all the way around to the base of it and completely encapsulated the bottle. I'm going to show you how to do that you're going to need some 18 gauge wire and some twenty eight gauge wire. Now those are the supplies you need In terms of the tools you're going to need a round nose plier if you wanna make will swirls like that. You're going to need a nice pointed flush cutter and also a chain nose plier is handy as well. You might or might not use this. So to start you're gonna cut your top wire which is the 18 gauge wire right here I'm actually going to take the cork out and in terms of how much you need is all depended upon the circumference of your bottle top this little area here between the lip and main body of the bottle and also what you wanna do with your swirls so what I suggest is just cut a length of what you think will be plenty big and then we're gonna cut it down as soon as we wrap it. I'm just going to take the wire wrap it around this neck area and have them criss-cross in the middle now if you want you can go around again, you can really do whatever you like now I'm not going to remove it, this is where it's going to rest but what I am going to do is I wanna make little swirls and for this particular project I'm going to cut so my ends are about even. We've got about an equal length on either side and now I'm going to take my round nose pliers, grip the tip and twist it up and over just make a little curly Q I'll do the same on the other side just work with it don't be afraid of the wire. So I can leave it like that I think that looks really fun or I could keep bending it a little bit more I made a little ding in my wire right there with my round nose pliers. I'm not very concerned about that, I really like this look. A little ding right there doesn't matter to me but you could take it apart and redo it. I'm pretty happy with that so that's what I want and now I'm going to go ahead and start to make my wraps and to begin with I'm going to wrap the two ends in place where they criss-cross so that they'll be nice and sturdy so I need some 28 gauge wire. I highly highly highly recommend 28 gauge wire for this it's actually exceedingly more difficult the thicker your wire gets In terms of how much you're going to use cut how much you're comfortable with. You'll probably gonna have to add more no matter what you do and I'll show you how to do that but I cannot work with five or six feet of wire. It's just too hard. I can work with about three feet of wire at a time. That works well for me. So that's what I like to pull off of the spool. Any more than that and it just becomes a challenge so I'm going to go ahead take the end of my wire and thread it behind my 18 gauge wire where they criss-cross and pull it so that I have a tail to hold onto. Now I'm going to hold that tail, find my other tail of wire this is why I don't recommend working with a huge length of wire at one time. When you can just add more wire as you go. So I've slipped it now under those two wires where they criss-cross and I'm just pulling it I'm going to do it very slowly so that if you're wire starts to kink up you can just work it out without it knotting see I'm just helping it along now I'm gonna pull it some more This would be a lot more difficult if your wire was any thicker than 28 gauge. So I made one loop and I'm just going to do the same and go over and under and around, over and under and around until I feel it's really nice and secure there's a second loop. Squish them together with my fingers and keep doing that that's what I've got so far and that will hold. For the purpose of the video I don't take too long just wire wrapping more right there but you can see in this other example I did I went about twice the length but whatever you like. As long as it's secure you're gonna be good so now we're gonna go ahead and start to make our loops, our netting. To do that I've got the wire exiting top here, pull it down hold it to make a loop Then you're gonna go out back down through the back side where your wires are and through that loop that you just made first couple loops are the most difficult hold that in place and then pull. That is our first loop. I'm gonna make another loop Go down the backside, underneath our 18-gauge anchor wire, then have basically a wire come out through the middle of the loop we just made I'm being cautious that it's not going to kink on me here we go you can see that loop is quite a bit bigger than the other one we're just gonna pull it until it's about the same size we're just going to work our way around this is jiggling a bit right here that's fine we actually want some space in there so that we can get our wire easily tucked in Now as you get the hang up this, I don't I feel like you need to make that little loop each time you can just take your wire, go through them go behind your main one in front of where you loop is gonna be and pull it and then pull it over to the side. You see the loops that we're making try to keep them all uniformed, again go behind. You see it's going in front or through how ever you want to interpret that and over. Make it a little smaller You probably noticed too I'm actually holding this down as I go, as I'm working my way around and I'm just doing that for my own sake because stabilizes the piece little bit better. It also presses those loops against the glass of the bottom. It kind of molds them to it get that edge behind that wire and make sure it comes out in the right direction. So hold this back back over this way As you can see that we're not going to edit this out we might fast forward a little bit so you don't see too much it but your wire does kink up it will become tangled just be patient and don't ever just pull super fast. You wanna be able to work out those kinks before they actually do make a knot of your wire I'm almost back to where I started so I'll take this little tail right here snip it off so it won't interfere. We don't need that wire anymore also my little tip of my wire here has become rather kinked up so I was going to snip it off as well. Remember the wire is your friend, don't be afraid of it I know it sounds cheesy but when you're making a project like this it can be a little intimidating having all this wire going in all directions but just remember it is wire, it does bend which means you can bend it and manipulated with your fingers to make it do what you want it to do okay so I'm almost to my starting point where I made my first loop make another loop and then I'll show you how to basically step down to the next row. It's super simple we're going to do one more loop and I'm just gonna go right behind all my bindings you'll see that my wire came out underneath the top wire so I'm just going to switch that around so it's back on top where I need it which is basically through that loop that I'm going to make ok so just pull on it. It's our final loop and now we have our first loop that we made To basically step down to the next row because you're going to have many rows you're gonna do, we're going to instead of going up over and behind our main wire here I'm just gonna go through that first loop that I made go from the front to the back, that first loop I'm onto of my tail is on top of the loop wire, the new loop wire I should say I'm just gonna pull. There is the first loop of our second row. So now I'm gonna do the same thing on the next loop Go one loop over, go through that loop there's our second. I'm going to do two more just so you can see. Then I'm going to go work on this on my own for a little bit because it is time consuming you don't want a hour plus video here but I will show you when I end up running out of wire I'll come back and I'll show you that how to end my wire and attach a new one. Then I'll go work on it some more and as I've been talking here I ended up with my wire that has a length attached to it underneath my loop. Which is not what I want so I'll push it out a little bit This is why I said you might need a pair of chain nose pliers and push it. I'm gonna grab it very carefully with my chain nose. Just pull so it's on top one more I will come back and show you how to end your wire and add a new one and then at the very end I'll comeback and show you how to actually do the base because it's slightly different and you'll end up skipping some loops narrowing in your netting. I want to show you how to do that go around and around until you have finished your entire length here if that's what you choose to do. You could just stop it here at some point that you just like the appearance. So that's what we've got so far. I'm gonna go ahead and keep working until I run out of wire and I'll see you in a minute. I've almost come to the end of my wire and I'll show you how to end your wire and add a new one and do one more loop so you can see that it's a little bit easier when you get to less wire going from the top to the back of that loop wire and pulling it through. You'll see how easy that just was and I don't have a big tail. Here so now I want to end my wire I'm choosing to end it in the back. I could keep going a few more loops and it here I think it would better if I end it in the back I just made that loop that you saw. Now I'm going to go through the loop I just made, pull my wire and help it so it doesn't get too kinked up and pull it tight. I'm going to do the same thing again through the loop I just made and pull my wire tight You want to do that two to three times. I actually think two is quite sufficient clip off my wire so I've just ended one wire. Now this actually I think looks quite pretty how it is. You can stop the project right now or if you do want to continue I'll show you how to add another wire. So take another length that you wanna work with now right underneath the wrappings that we just did we're going to thread it through that same loop and hold the longer end of the tail and I'm gonna make several wraps around this loop in the same fashion I just did with the wire that I ended keep my fingers out of the camera view here do two that's one and two You can see the join. You can see the join on this one too right here it's a bit unavoidable but it's pretty discrete especially if you do position it in the back trim off that tail now so now I'm gonna pretend like I never added another wire and just continue on my loops. I've got this big tail again but that's fine if you don't mind more joins and doing that more often you can get away with working with a shorter piece of wire you'll just have to add more wire as you go It ended up under my wire instead of on top of. So again grab with my chain nose pull it through and make my loop that loop ended up a little wonky there but it'll just get hidden by the time I do a couple more rows so one more then I'm just gonna continue all the way to the base. So then when I get to the base I'm gonna stop and I'll show you how to finish it up So I've worked my way all the way around the bottle and this is actually quite time consuming. It's a lot of fun but allow yourself time to do this. I've gotten to the end and you'll see that the actual net is quit flexible you'll know you're at the end if you can pull it down the bottom scallops are against the bottom edge of your bottle and you can see what we're going to try to do here in the finish example is now we want to take our wrappings and wrap them around the bottom To do that it's gonna be the exact same process that we've been doing taking our end and putting it through the loop making another loop what you're going to start to do is start to kind of pull it towards the bottom and with your finger push it down over that lip. We're just gonna continue in the same fashion just pulling it and pushing it you can see this has been the same technique all the way. We just pulled and pushed it I've pretty much come now to where we began this portion of the video and so we're just going to continue around again but I'm going to do something. You see here's the next loop it can a little hard to see on camera. I'm going to skip over it and go into this loop and there's really no rhyme or reason as to which one you might skip over. I could have just skipped over one here or here or here it's just kind of a matter that you're gonna want to end up with fewer loops in the middle. So when you see an instance and maybe a slightly smaller loop that you can skip over, skip over it and see that just pulled it a little bit tighter by skipping over one. So now I'm not going to necessarily skip over the next one. I could if I wanted to but I don't have to. I'm going to just go into the next loop it's all going to be about what your particular loops look like. You're just trying to pull this in a little bit tighter and you can do that by just decreasing your loops by occasionally skipping over one here and there and you do that all the way around on this bottom when you see an instance where you can skip over a loop and it won't affect really the overall esthetic of your design. You're gonna skip over one. I'm skipping over another one here It might be a little hard to see this fine of a wire on the glass bottles. I know that might be a little bit of a challenge I have gone into every loop like the last couple here. Then I think I will skip over another one I'll skip over another one. You can see there's not a pattern. It's not like you skipped every other one or you start by skipping one and count 3 and skip one you can do that if you want to but I think it easier just to be like okay this looks like a good spot where I can skip one You can see I'm narrowing in now as I go I actually wanna show you, I know this is lengthy but I wanna show you the whole process here. So I'm going to actual skip over another one it seems like I can as you get tighter into the middle, you'll end up skipping over more loops I just kept one, I did one skipped one, putting it inside of one. Now I'm going to skip another one go inside of one. I feel like I'm almost to my last loop. I'm just using my tool here to help me pull it out. It's a little tight maybe I will do one more right here that looks good. So all I have to do now is get rid of my tail and secure my wire. To do that I'm going to go ahead bring back some of my other tools. I'm going to cut my wire. I have about 3 or 4 inches make it a little bit easier to work with and what I want to do is I just want to stick it under the wire that I was just working with get in there with my chain nose so I'm wrapping the wire around itself just like what we did when we added a new wire earlier on. Make two wraps There we go. All I have to do now snip it and we have a completed bottle It's got the wire on the bottom, got the wire along the side and it's got its cap and if you do this project using these bottles I am going to recommend that you do glue the cap in place if you fill the bottle with anything because its a little loose. You can stick it in there but your you're going to want to glue that in place. So I know this was a long video. I hope it was easy enough to follow and see what I was doing with the thin wire on the glass bottle but it's a fun technique be patient with it. Give yourself some time definitely use the 28 gauge wire. You can try it with 26. It's gonna be a lot harder and your loops are not gonna look as fluid and as soft. They're probably gonna get more kinks in them and just going to be a little harder to work with but that is how you make a wire net around a glass bottle. Go to www.beadaholique.com to purchase beading supplies and to get design ideas!