How to Create a Shadow Box Pendant with Nunn Design Resin by Becky Nunn

SKU VID-1188
Designer: Becky Nunn
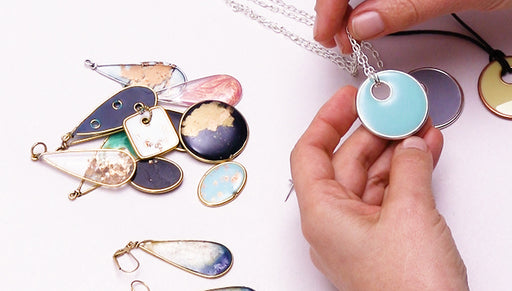
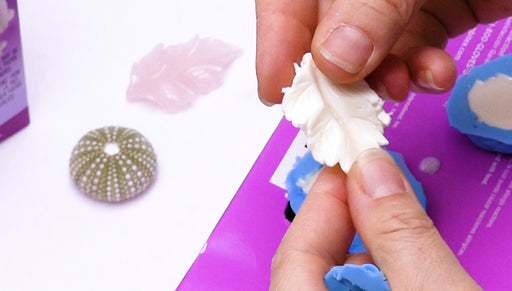
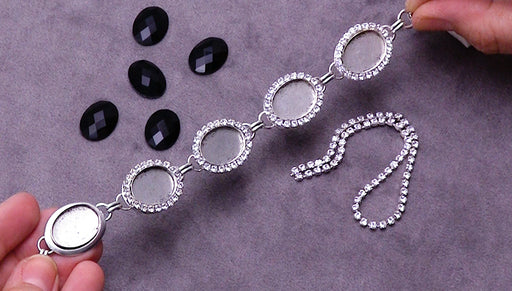
In this video you will see how to colorize a stamping using mica powder and Nunn Design sealant, how to use a 2 part epoxy clay and how to pour clear resin over the top to create a shadow box pendant. You will also need gloves and a toothpick for this technique.
Audio Transcript
Note: This audio transcript is auto-generated and may not be completely accurate.
hi this is becky nunn with nunn design i'm on location as a guest designer for beadaholique.com is a brass stamping with mica powders and Nunn design sealant how to use a two-part epoxy clay to create the shadowbox look and then we'll pour a clear resin over the top to create this look here what you'll need for this video is an open frame channel and a flat tag both by Nunn design you'll need some brass stampings some Nunn design two-part resin I'm using a black crystal clay that I have equal sized balls a variety of different types of mica powders and the colors that you would like Nunn design sealant and some toothpicks and stir stick the first step is going to be determining what design you want to have within your shadow box frame in this example I use the bird but as you can see it's a lot larger so I used a pair of flush cutters to trim away the wings so that it would fit nicely inside of that piece and in this piece where I use the seahorse you can trim off a little bit of the tail just with a pair of flush cutters just take your flush cutters and just cut off that excess and then check to see well that fit nicely inside and there you go that looks great I'm gonna try it with the bee for this example there's no cutting necessary so the next thing we're gonna do is we're going to colorize a little bit of a nun design sealant and paint that over the top of it to kind of give it little bit of interest as you're seeing here this has copper and silver this has a little bit of gold and green on it this isn't a necessary step but if you'd like to you can try this out I actually do have another video on beadaholique.com a can let's try the screen color and then using a stir stick take a little bit of your mica powders and place it on to the sealant then with a toothpick go ahead and mix that sealant together with the mica powder and you'll create a color that you like and you can do this with a variety of different colors if you wanted the wings to be a green color and maybe the body to be a different color you are able to mix different colors up and then I'm just using the mica resin right on the wings I'm just using it right with my toothpick and let's see I think I would like to have a little pink let's try pink so a little bit I think this might be kind of a pink gold mix that up oh that's pretty go ahead and put that on the body of the B that's not showing up much is it yeah it's a little little light but you can get the idea of it's kind of like a full enamel look right there on that brass stamping a little bit of time is passed and our pieces now dried so you can see our mica powder with the sealant over the brass stamping and we are ready for the next step while we were letting that dry I went ahead and mixed together our two parts of the crystal clay to make one nice black consistent ball and I also mixed up an X another batch of fresh resin so we can move on to this next step so with your crystal clay this is what we're going to use to make the shadowbox part I had a pretty good sized ball worth and I'm just double-checking that that's gonna be about the amount that I want if I had too much I would probably pinch off some and start afresh but that gives me a good idea that that's gonna be about the right amount so I'm placing my open bezel on top of the tag this loop here and that loop is where this piece is gonna dangle off press those together and then press down attaching the crystal clay to not only the flat tag but to the outside edges of your open bezel so I'm using my thumb to just press down directly down for this first round just make sure that it's nice and pressed down making sure my loops are still lined up and then I'm gonna use my thumb to press that clay to those sidewalls to make sure that I don't have a gap in between the clay and the wall because when I pour that resin on it'd be easy for that resin to drop down into that gap and that will cause some air bubbles to come to the surface so once you have your piece looks like I've got a nice contact on all the sidewalls go ahead and lay that down on your work surface and then place in your brass stamping so I placed it just lightly in and now I'm using my toothpick to position it and then I'm gonna press it down fully into the clay and that will allow us to have a nice flat contact so that there's not any room for the resin to seep underneath and again cause air bubbles so you can see this all the way embedded now you're ready to start pouring your resin right on to the piece I do this without letting that clay dry and I haven't had any issues whatsoever with bubbles so we'll see how we do here so at first I'm just putting a little bit right in the middle and I'm kind of just putting it over any areas that I think there could be any challenges down by his feet I don't know do the bees have feet and all the way over by the wings so now I have a full he's fully everywhere it was connected to that resin it's fully covered and now I'm just gonna continue to drizzle more resin right into the piece before the piece is completely filled and I have a high dome worth of resin in there I'm gonna stop this is why I like to keep it even on a card so it's easy for me to rotate it around I'm gonna come in here and see if I have any air pockets so I'm gently going along that outside rim so that's where that resin was connecting where the clay was connecting with the outside of that bezel and just agitating it a little bit to see if I have any air pockets inside of there and and just continue to drizzle more resin until you get a look that you like you can stop right there and just have it be a flat look or you can continue to add more until it's nice and domed if you fill up so much that it runs to that outside edge it'll go up to that outside edge and then use your toothpick just to go along the whole outside edge and make all of it go do you understand so there's not just a certain area where some is over you want to make it all over let me see if I can create that so you'll know what I'm talking about okay so imagine that you got some resin over on the side right there see how that part is over and the rest of it isn't if that happens just use your toothpick to drag it over to that side edge and make it consistent all the way around using my card to turn this is just a finishing touch to really make it look nice and clean and polished and there you have it there's your shadow box pendant first we added mica powders with sealant to the brass stamping to colorize it we added some color right that way then we added a two-part crystal clay in the base which was black Press Center stamping and then added a Nunn design two-part resin over the top and here are the piece here's a piece that is already finished this is becky nunn at beadaholique a sad oh box pin it you

You recently viewed

Clear recently viewed