
|
Artistic Wire, Chain Maille Jump Rings, 18 Ga / ID 3.57mm / 110pc, Tarnish Resistant Gold Tone Brass SKU: FMC-1353 $4.75 |

|
Artistic Wire, Chain Maille Jump Rings, 18 Ga / ID 3.57mm / 70pc, Tarnish Resistant Silver Plated SKU: FMC-1354 $2.45 |

|
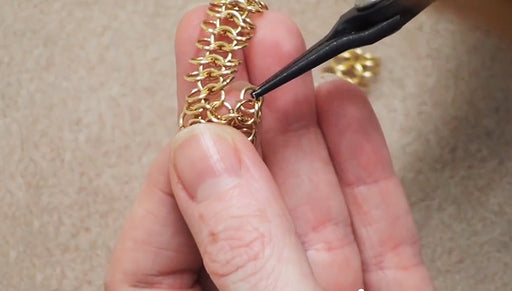
Xuron Jeweler's Super Fine Pliers Chain Nose Flat Nose SKU: XTL-5450 $25.99 |

|
Beadalon Large Beading Mats - Prevent Bead Rolling 13 X 18 Inch (Set of 2) SKU: XTL-9935 $6.75 |
Related Videos


How to Make a Japanese 8 in 2 Chain Maille Bracelet With Austrian Crystal Edging
In this video, learn how to do the Japanese 8 in 2 chain maille weave and make it into a bracelet with Austrian crystal bicone beads along the edge...
View full details

How to Make Dragonscale Chain Maille
In this video, learn how to make the dragonscale variety of chain maille. This intricate weave is beautiful, and truly does resemble scales.
How to Make a European 4-in-1 Chain Maille Bracelet
Learn how to do the European 4-in-1 Chain Maille weave and make it into a bracelet. This video will show step by step how to do the weave, attach a...
View full details