How to Make a Bride and Groom Metal Stamped Necklace

SKU VID-0868
Designer: Julie Bean
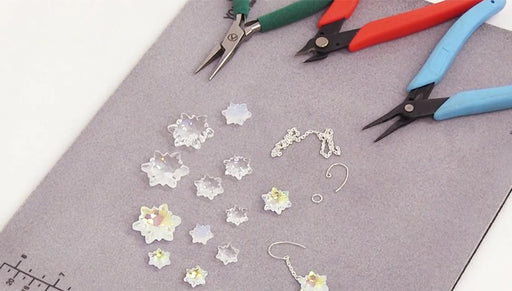
In this video see how to make a charming metal stamped necklace featuring bride and groom stick figures and a pretty Austrian crystal channel charm. This would make a lovely bridal shower or wedding gift.

The brand name for the crystals shown in this video is no longer available. High quality Austrian crystals are now available under the PRESTIGE™ Crystal Components line.

Audio Transcript
Note: This audio transcript is auto-generated and may not be completely accurate.
Hi, this is Julie with beadaholique.com in different shapes I'm going to be using this really fun rectangle and then a premade necklace chain some jump rings and some of these little channel charms that are crystal by Swarovski crystal and I picked blue because something old something new something borrowed and something new great way to incorporate blue we're also going to be using these impress art metal punch stamps and I have their packages right here so you can see the ones we're actually going to be using so we're going to be using the stick room the fancy and and the stick bride and for tools you're going to need a pencil two pairs of chain nose pliers the stamps of course a scrap piece of wire or a toothpick a Sharpie pen brass hammer this one's by impress art a bench block and some type of sealant so I know there's a couple things in here that you probably like what are we going to be doing with these guys and these are going to be quick little tips that you might be able to use with your other stamping projects so I wanted to show you something more than just how to make this necklace I want to share a few tips so I'm going to start by stamping my blank so I'm gonna put it on my bench block and here's your first tip I want to kind of pre space where I want my stamps to be so I'm going to be using three of them all in a row so it's gonna go bride and symbol groom and what's nice when you use a pencil if you use a very light hand you can draw on these blanks and then just wipe it away when you're done so these are going to be my guides so I want the end to fall right about here so I'm going to make a line I want the bride to fall right about here so I'm gonna make a line and I want the groom to fall right about there so I've got three faint lines I actually want the bride a little higher there we go so that's your first tip now we're going to take our bride so we're going to look at it so with these impress art stamps the actual lettering and the little shape of what the stamp is going to be is what you want facing towards you that means it's going to be properly oriented when you do the punch so the bride is facing away from you which is what I want and the lettering is facing towards me so I'm going to lay this right on my stamp and I'm going to line it up with that pencil line I made and now I'm going to use my breath hammer and I'm just going to do a nice nice clean strike so we've got my bride now I'm going to do the and same thing I want to make sure that impressed art lettering is facing towards me I line it up on my line and a nice clean strike and now I'm going to go ahead and do my groom same way all right so I've got a bride and groom I'm gonna wipe away that pencil mark now I could leave it just like this and it's actually quite pretty just like that but I want to pop out that design a little bit more so I'm gonna use a sharpie marker and that's where this comes in and our little scrap piece of wire and also our sealant and I have a very um slightly damp paper towel is really very slightly damp so I'm gonna take my marker and I'm going to draw into the lines just draw right over it okay and I'm gonna quickly wipe away the excess and now we can see the imprint of my bride much better so keep wiping away cuz you don't want to on the top of a stamping blink but you can already see the difference between the bride and then the and and the groom so we're gonna do the same thing again let's draw on it to make sure you get in those lines wipe it away okay and finally the little groom and wipe it away so now I'm happy with that now the thing is is the permanent marker will probably stay on there but if you get this wet or it goes through a lot of wear it might rub off in time so I'm just gonna take a little bit of sealant and put it over it not much you don't need a lot could paint the whole thing and sealant if you wanted to but I basically just want to get on top of that marker okay to wipe away the excess too again we're not needing a lot it's very fine lines all right there we go and that is done so now we're going to go ahead and put it on our pre-made chain okay so you could do whatever type of chain you want and we're just gonna use a jump ring and remember there are other shapes as well so you could do this whatever shape you like I just thought that long rectangle was fun so open a jump ring by grasping out on either end with a pair of chain nose plier the cut part is up top twist now I would probably have left my sealant dry a little bit more if I wasn't doing this on video but I do want to show you how to do this pretty quickly now I have a very fine chain so it's gonna work with this jump ring there we got close it back up alright so now time to add our little charms and you can add as many or as few as you like they don't actually know how many I want to add I think it's something that will just kind of evolve organically I'll put one on see if I like it okay so there's one and I actually just like one I think but you do have more if you want to use more so I hope you enjoyed this quick project to make a very personalized special necklace for a bride in your life or for yourself you can find all the supplies and more projects and tutorials at beadaholique.com you

You recently viewed

Clear recently viewed