
|
Lobster Clasps, Oval with 2 Jump Rings 20x15mm, Silver Plated (1 Set) SKU: FCL-1666 $3.39 |

|
Lobster Clasps, Oval with 2 Jump Rings 20x15mm, Gold Plated (1 Set) SKU: FCL-1665 $5.15 |

|
Fiskars 5 Precision Tip Scissors - Super Sharp SKU: XTL-5700 $7.45 |
Related Videos

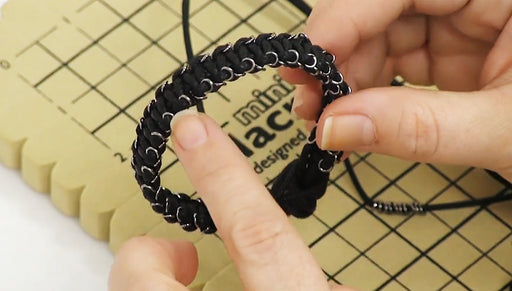
How to Use Closed Jump Rings in Macrame Square Knots
In this video see how to use closed jump rings to embellish a macrame square knotted bracelet. The closed jump rings adorn the sides of this bracel...
View full details
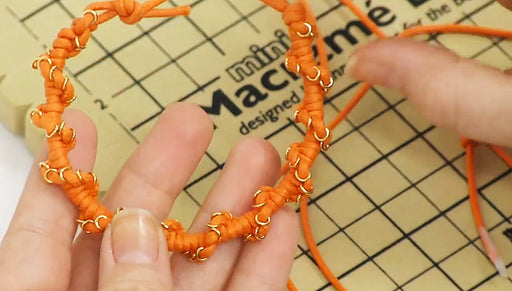
How to Use Closed Jump Rings in Macrame Half Hitch Spiral Knots
In this video see how to use closed jump rings to embellish a macrame spiral of half hitch knots. This is a great way to embellish a simple bracele...
View full details
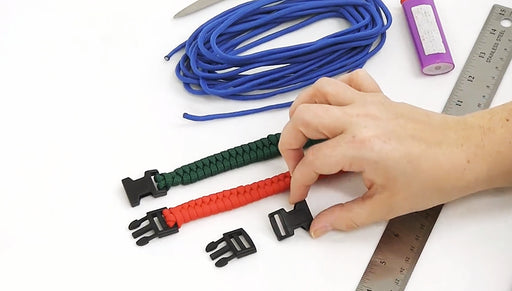
How to Make a Fishtail Paracord Bracelet
In this video, you will see start to finish, how to make a Fishtail Paracord Bracelet.