
|
Stretch Magic Clear Stretchy Beading Cord 1mm/.039Inch Thick - 5 Meters SKU: XCR-2115 $3.99 |

|
Czech Glass Pastella Collection, Smooth Round Druk Beads 6mm, Peach Blossom (1 Strand) SKU: BCP-1601 $2.89 |

|
TierraCast Antiqued Silver Plated Pewter Talavera Star Bead Caps 5mm (6 Pieces) SKU: BMB-3873 $2.99 |

|
G S Hypo Cement Precise Applicator Essential! SKU: XTL-1001 $9.35 |

|
Crimp Bead Covers, 5mm, Silver Tone (144 Pieces) SKU: FCR-1055 $10.29 |

|
E6000 Industrial Strength Glue Adhesive (0.18 fl oz) SKU: XTL-1054 $2.99 |
Related Videos


How to Decorate Gift and Jewelry Boxes
This video demonstrates two fun and different ways to decorate kraft jewelry boxes. Use these ideas to package your handmade jewelry - either for g...
View full details
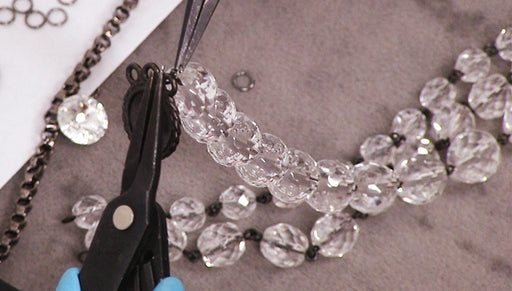
How to Make the Multi-Strand Crystal Elegance Necklace
This necklace features three strands of Czech glass bead link chain that drapes prettily available on Austrian crystals rivolis.The brand name for ...
View full details
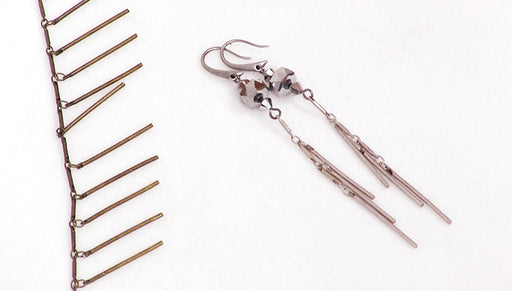
How to Use Bar Dangle Chain to Make the Chrome Comet Earrings
Using bar dangle chain you can create a wide variety of jewelry projects including these fun space-themed earrings.