How to Make the Kheops Par Puca Wrapped Tassel Bracelet Kit

SKU VID-0887
Designer: Julie Bean
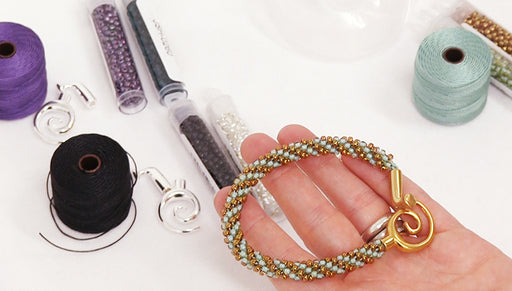
In this video learn how to make the Kheops Par Puca Wrapped Tassel Bracelet, an exclusive kit from Beadaholique. You will learn how to attach a magnetic clasp, string the beads, finish the piece, attach a charm and make a tassel. Techniques taught include how to crimp a crimp tube, basic stringing, how to open a jump ring, and how to make a tassel.
FEATURED IN THIS VIDEO
Audio Transcript
Note: This audio transcript is auto-generated and may not be completely accurate.
Hi, this is Julie with beadaholique.com Tassel bracelet kit an exclusive kit from beadaholique.com to show you what these are going to look like when finished and these triangle beads are the key ops part Puka beads and you can see that we've done a pattern of alternating colors with little seed beads in between and each one of these bracelets is finished with a really pretty charm so we've got the black and silver we have a really pretty muted pink and green color combination a purple and pink with these great gunmetal silvery beads between and then we have a very nice resort look with the turquoise and the gold and the turquoise and the gold is the one I'm going to do here in the video and you'll notice each one is finished off with a tassel when you purchase an exclusive kit from beadaholique.com you get two lengths of pre-cut beading wire 30 inches long each you're going to get two tubes of the key ops part Puka beads so that here you can alternate the colors a tube of seed beads the charm a jump ring two crimp tubes two crimp bead covers and a magnetic clasp and then you're also going to get the entire spool of pearl cotton to make that tassel so you're going to end up with a lot of extra pearl cotton to make many more tassels to do with whatever you like so one of the advantages of an exclusive kit is you do get just the items that you need so you're not having to buy a lot of extras so instead of having to buy a hundred crimp tubes you're going to get to 100 crimp covers you're going to get to and so forth so it's really a fun gift item or something that you can put together for yourself now I did mention that the tools are not included in the kit but they're really common tools that most jewelry makers have around and they include a standard pair of crimping pliers a regular pair of scissors a cutter and two pairs of chain nose pliers so I'm going to show you how to make this now I'm going to make one to fit my wrist but you do have enough supplies to make an 8 inch bracelet that would be wrapped three times so first let's undo our beading wire so just kind of work it out with your fingers it is packaged in these little coils so that is pre-cut for you so it saves you some labour and measuring but you just need to kind of slowly work it out with your fingers and stretch it out there we go now we're going to start by separating out our magnetic clasp and taking one crimp tube we're going to line up the ends of our wires and we're going to thread both of them through that crimp tube and then also through the little loop on the end of our clasp and we're going to bring the wires back around and down through the crimp tube going in the opposite direction there we go so we've made a loop and now we have four wires coming out we've got the two tails and then we've got the two long ends make sure that they're lined up so now go ahead and pull that crimp tube closer to the clasp like so and now we're going to crimp it what you do so if you're not familiar with the crimping plier what it looks like is you've got two notches one that's crescent-shaped which is closer to the handles and one which is more oval shape we're going to be using both of those notches beginning with the crescent-shaped one to flatten the tube and then we're going to use the oval one to really secure it and make sure it's tight so to begin go ahead and fit that crimp tube into that notch closest to the handles now this is a magnetic clasp so it has stick to the pliers a little bit which can be interesting but just be patient so I've got it up towards the clasp I'm holding the wires and I'm just going to press you'll notice it's going to make it into a little beam shape a little Crescent and that clasp is really sticking so this is what we have so far so we're half done with our crimping now we're going to go ahead turn it on its side and put it into the Oval notch and just be patient with that clasp okay so we have it in the Oval one I just want to make sure it stands up in there and press so you fold it over the two halves of your crescent so you folded them together and that's really nice and secure now so now we're ready to start beating so we're going to be these ends together so by that I mean we're going to take one end well we're going to take both ends I should say and we're going to put a seed bead on both okay and now we're going to thread Yukie ops part polka bead onto both as well I'm going to slide this down so you can see what we've got so far now I want these ends little loose ones to go through both of these beads as well some people like to trim them right after the crimp I liked them to go through a couple beads it just makes me feel like they're a little bit more secure there we go okay we've come out the end as well and slide it down to the base now it's important to remember with this particular pattern is you want all your triangle beads facing the same direction so you're always going to thread them on in the same orientation so let's do another one so make sure that your wires don't get crisscross as you're doing this and we're going to do another seed bead on each and since we just did a blue now we're going to do a gold and we want to be that same orientation so remember how you place the last one and slide it down again I do want these to go through both wires you only have to do this for a few beads and honestly not everyone does it it's just something that I've found as a jewelry maker I really like just not having short little ends of wire right after the crimp bead or crimp tube okay there we go this is a start of our pattern and now I'm not going to really feel need to do any more with those guys I'm going to wait to cut them off at the end in case they come out a little bit so I always do that at the end but we can just go ahead and string on our beads wires are not tangled so we need two more gold and then we need a turquoise now two more gold and then a gold gold key opps I should say I'm going to do one more I'm going to slide them down and then I'm going to go ahead and bead the rest of it off-camera but it's the exact same pattern that you're just going to be repeating okay so here we go we got that pattern going so I'm just going to slide these guys down okay and at the end I'm going to take these off but you'll see this is what we have so just keep repeating that step for as long as you want and what I'm going to do is after I have quite a bit beaded to about probably here I'm going to actually wrap it around my wrist and use that as a measurement to see how long I want to beat this so I'm going to do a little bit more off-camera then I'll come back and I'll wrap it on my wrist and then I'll show you how to finish it off make the tassel attach the charm etc as you can see we've done quite a bit more beading but it was the exact same technique I showed you just a second ago in the video and to measure how long you want this Tippie what I like to do is I like to use my own wrist and I like to wrap it around three times to see what's comfortable and I don't want to wear this bracelet too tight I want a little bit of leeway so I'm actually happy let's stop in where I'm at now one thing to note is you don't want to pull your beads too tight when we attach the other side of the clasp because if there's not room for the beads to bend on the wire it's going to become too stiff and it's not going to feel right it's just going to be uncomfortable so you want it to have a little bit of give to it I'll show you what I mean by that right now since I've beat it enough for my wrist so I'm ready to attach the other half of the clasp so I'm going to go ahead line up my two wires thread on another crimp tube and then also the other half of the clasp okay we're going to go back down we're going to loop over and go back down through the crimp tube again and I'm going to do those several adjacent beads as well okay now just work it down so that you're pulling that loop tighter you're pulling both of the cords both of the beading wires I should say okay so go ahead and scoot the crimp tube up towards the clasp but you're going to want to leave a little bit of space here I know this is contrary to what you're probably used to when you do a lot of beading but if you do pull it too tight it's just not going to wrap very comfortably around your wrist so I want that little bit of space let me make sure it's still flexible enough right now and you can make it a little tighter but not much okay now I'm going to crimp this crimp tube again I've got that magnetic clasp working against me but I've got it in the notch and I'm going to crimp it and now I'm going to go ahead and put in the Oval notch fold over the two sides and now I'm going to trim my wires and then I go to the other end and do the same so we're going to go ahead spread out the beads a little bit since we have that little bit of extra room on the one end so that this is going to be really nice and flexible now we need to add our crimp bead covers so if you're not familiar with what a crimp bead cover looks like here it is like a little open bead essentially and we're going to fit it over the crimp bead and then squish it to the two ends together so it's shut and looks like just a nice solid bead hiding our crimp bead so go ahead and place it into your pair of chain nose pliers with the opening facing out whoops guys could be hard to hold on to sometimes so now all you're going to need to do is just slide it over your crimp bead and then I'm going to squeeze it shut and give you a little bit hard again with that magnetic clasp does like to wreak havoc pliers and squeeze it shut okay now we're just going to the other end and do the exact same thing darn magnetic clasps they are wonderful but they prove to be a little challenging sometimes okay squeeze that one shut that's done as well so our bracelet is now actually complete all we have to do is make the tassel and add the charm so I'm going to set the bracelet itself aside for a minute we're going to make the tassel go ahead and unravel some of your pearl cotton and grab a tail between your thumb and your index finger and we're going to wrap it around our hand about 1213 times so there's 1 2 3 4 5 6 7 8 9 10 11 12 and 13 go ahead cut it off and now cut yourself a length is about 12 to 14 inches long so I've got a little cut length slide it off your hand holding the loops and squish them together now we've got one little tail right here I want out of the way there we go okay so this is what we have right now we're going to take that and we're going to thread it through our jump ring like so fold it in half so the jump ring is up top and now we're going to wrap this cut piece around the top part of it to secure it so I like to do a couple wraps and then I like to tie a knot it's gonna be a little tricky tying a knot actually sometimes take my chain nose plier and use it as a more precise tool here there we go to feed that end through it this is when you wish you had a 30 M I will admit I've used my mouth I have just grabbed it with my mouth before okay so we made a knot however you make another knot that is secure so you can rock it some more if you want if you want a little thicker band so I'm going to wrap it again and I'm into another not and one more okay there we go now I'm going to trim my tassel so I'm going to cut the bottom loops go ahead and smooth them out and then trim it you can make it long you can make it short whatever you like we have a tassel so now we need to attach it and the charm to the bracelet to do so go ahead and take your two pairs of chain nose pliers and this is an open jump ring that we put it on open the jump ring being cautious that the tassel doesn't slide off and slide on your charm and then also attach it either up near your clasp or you could do it at this little bridge between your wires wherever you like to put it on your bracelet and close it and we are now done so you want to make sure that that's closed really well I just realized it wasn't there so you have a wrapped tassel bracelet with a really pretty charm using the key op spark hookah beads and these exclusive kits are available only at beadaholique.com you

You recently viewed

Clear recently viewed