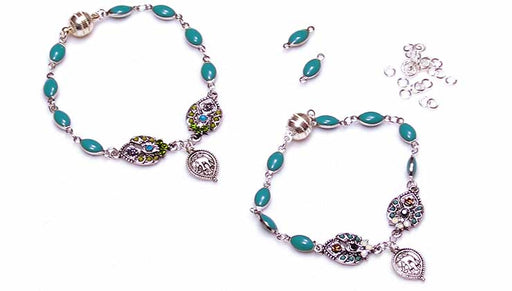
How to Make the Wanderer Memory Wire Bracelet Set

SKU VID-1535
Designer: Julie Bean
In this jewelry making how-to video you will learn how to work with memory wire and how to make a gemstone chip memory wire bracelet accented by TierraCast metal rondelle and spacer beads. Finishing off the design are mini charms from TierraCast's Worlds Away collection. Featured on the bracelet and in the video are the TierraCast hamsa hand charm, naja charm, north star charm, and arrow charm.
FEATURED IN THIS VIDEO
Audio Transcript
Note: This audio transcript is auto-generated and may not be completely accurate.
hi this is Julian beat Halik and in this video I'm going to teach you how to make the wanderer bracelet set I've already made one of the two bracelets that we're gonna need for this set as using memory wire gemstone chips which are turquoise gemstones these wonderful spacer beads and rondelle's by tier cast and then finishing it off are these charms from the worlds away collection by tierracast we have the North Star the hamsa hand and then for this other bracelet the arrow and the Naha and then they do come in other finishes too if you are interested in doing this in a different color weight with maybe even a different gemstone so what you're going to need for this project you're gonna need some memory wire so this is bracelet size memory wire it's great it retains its shape I've actually already used some off this coil and I still have a lot left so you do get quite a bit you're gonna need two charms for each bracelet some 4 millimeter jump rings to connect your charms and then here I have three different little petite beads I've got a little spacer bead here this is a 5 millimeter I have a 4 millimeter rondell Rococo or I should say Rococo rondell and then in the Rococo style as well there's a 6 millimeter rondell these are all tierracast as well I've got my turquoise gemstone chips and they're wonderfully irregular which is what you want in a gemstone chip you want to create that really that interest of a texture and really a different look because they're not all uniform now this amount here combined with this amount amount here equaled one strand of turquoise chips on the beadaholique website we'll have that information below in the video here now for your tools you're going to need a pair of memory wire cutters do not use your regular cutters you will damage them so definitely memory wire cutters a pair of round nose pliers and a couple pairs of chain nose pliers let's go ahead and begin so let's reference our samples so we can see what were going to be doing we're going to be doing a bracelet that is one-and-a-half loops of the memory wire and so that it adjusts to a lot of different wrist sizes and it also will stay on when you wear it because it does have that nice half of a loop overlap so that is definitely essential and memory wire does retain its shape which is great then we're going to be doing well anywhere from three maybe two maybe four turquoise chips and then spacing it with either a cluster of these wonderful little spacer beads or just a single one and it's really there's really no rhyme or reason in terms of which ones you put where or when you want to do them it's really all preference we just want to make sure we get that metal element throughout the design and then of course we'll attach our charms with those jump rings let's start by cutting our memory wire one and a half loops so if you look at the end of the memory wire which is right here where it overlaps on the coil is one loop so if we were to cut it right here that would be one loop but we don't want one loop we want one and a half so we're gonna go all the way across to the other side and we don't want to cut our our main loop but right here we're gonna cut and that's gonna give us one and a half loops so if you look at this here's the end and here's the end and we're gonna start by creating a little simple wire loop on one end which is going to act as our bead stopper and then also the loop we're gonna hang our charm from eventually so grab it with the tip of your round nose pliers and twist it over so we made almost like a little hook and now we want to complete it so it is a loop if you want you can bend it back just slightly so it's a little bit more centered personal preference does not affect the design functionality at all okay so now we're just gonna start stringing on our assorted beads I'm gonna start with a metal element and you'll see that when it gets to the base it's not gonna fall off because we have that loop now add some of the turquoise may be able to to add a different little baster this one with the little beads on the outside you'll see how this starts to take shape really quickly now I think I'm gonna do a little cluster of three of these I have the 4 millimeter her Coco style rondell followed by the 6 millimeter and another 4 millimeter and it just creates kind of an interesting little assortment right there so the charms are from the Terra caste worlds away collection that's what made me think I really wanted a kind of you know like I named this the wanderer so I really wanted something that was very organic feeling something that looked like something that a person who loves to travel might wear maybe they find these cool beads along the way just something really interesting so here we go you can see what we're doing and even though I'm pulling out the memory wire it's not miss shaping it at all it bounced right back and then I'm gonna add a metal element and I'm just gonna add one bead now and add another metal element so again you're just trying to make sure you have metal throughout and I think it's fun you see that your sizes of gemstone ships vary quite a bit so we have like find a good example a tiny one and a big one I think it's nice to mix and match I'm just continuing to add these beads and scoot them down and you can look as you go and see what they look like if you ever don't like something you can just go ahead and take it off slide off and start again I'm gonna do this all the way around the whole bracelet if you're doing this bracelet at home and you buy all the supplies for this and you're wondering in what order are you gonna put these on well there is gonna be a really nice product there is going to be a really nice project image on the beadaholique.com website so you'll be able to see that and reference it but really don't worry about just put these beads where you want every couple gemstone chips have fun with the placement I wouldn't worry about making it exactly like the one I'm demoing here okay so we're almost done we've strung almost all of our beads we have maybe three quarters of an inch left so we do have a few more beads to string but before we do that we're gonna start to really it's a matter of wiggling our beads there's no other way of putting it you're gonna twist and position your beads because you want them to sit on top of each other as nice and neatly as possible and because the gemstone chips are irregular sometimes if you just twist them a different way they'll sit a little cleaner on top of the one below it and that will free up some extra space here where you'll need to add more beads before you finish your bracelet off so just go through twist wiggle and as you're doing that so you can see here how these are all nice and neat together and that happens by just kind of twisting them a little bit and it might mean you're only going to add one or two extra beads but those one or two extra beads will prevent a gap forming later on if exposed wire okay that's feeling pretty good and tight and now we're ready to add our last couple beads and you're going to stop when you have about 1/4 of an inch left and since I started with a metal bead I actually do want to end with a metal B that's just my preference you don't have to but when I think I'm about to that quarter inch mark I'm going to end with that metal bead and I'm gonna create another simple wire loop I'm just gonna grab that wire twist it around until it makes that nice loop and now we're ready to add our charms so to add our charms we're gonna be using open jump rings scoot this out of the way right now so we have four millimeter jump rings and we're gonna grab them on either side with a pair of chain nose pliers twist open grab our charm place it on it and twist it shut now we're gonna grab another jump ring yeah we're gonna open it as well the same way grab the jump ring we just attached and then hang this on our bracelet and this here see I can just attach it to that loop you made and close it on it there we go I wanna do that one more time and the reason we're using two jump rings you might have made another memory wire bracelet she only used one it is because of the orientation of this little bail loop on these tierracast charms if you were just add one jump ring they would hang to the side by adding two you have them hang straight and facing forward our second jump ring attached that one on close it on up and we finished our bracelet I mean I put both of them on my wrist and you see with memory wire you can just twist them on but there we've got this set so you can make one and keep one you can wear both together it's fun to have these little charms hanging out very quick and easy project a great project for beginners if you're just starting out and a really fun quick project even if you've made a ton of jewelry before these are really great really wearable and fun to stack and layer with other bracelets that you might have

You recently viewed

Clear recently viewed