How to Use Glass Shank Buttons in Bead Embroidery

SKU VID-0399
Designer: Julie Bean
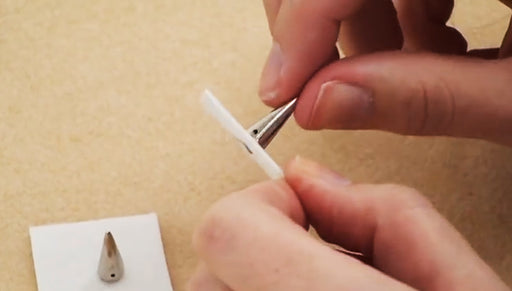
In this video see how you can incorporate buttons with glass shanks into your bead embroidery. Two different techniques are shown which allow you to stabilize the buttons so that they lay flat on the beading foundation.
Audio Transcript
Note: This audio transcript is auto-generated and may not be completely accurate.
Hi this Julie with Beadaholique.com and I'm going to show you how to incorporate buttons with glass shanks into your bead embroidery there are so many beautiful buttons out there and they're lovely, they're one of my favorite things but they can be a little challenging trying to figure out how your going to work them into your embroidery because if you've done a lot of bead embroidery you're probably that you'll need a flat surface like a cabochon has where it's completely flat. Where it buttons or not. You can see that so we need to remedy that, we need to somehow either set them down into our foundation. I have Lacy Stiff Stuff right here or I need to build it up. So I'll show you two ways of doing this and I think their the two easiest ways. There are other possibilities out there but this will give you a really good start so first off what we're not going to do, we're not going to try to cut that shank. It is glass and it will shatter you can injure yourself. You might actually crack the entire button if you're using vintage buttons you definitely don't want to risk that so the first way which is actually my favorite way is to set the button down into the foundation itself. The way you're going to do that is I'm going to cut a little piece so let's say I was making a focal pendant and I wanted about that much around my centerpiece make a little mark in the center and then here's a really handy trick I'm going to give you a warning. So I have a Thread Zap You're probably used to using this to burn your threads to really easily cut them and here I have an older one and I no longer want this for my threads so I wasn't too concerned if the tip got all gunky and what the Thread Zap does to Lacy's Stiff Stuff, it's pretty cool. I'm going to make a hole about the size of my shank right in the middle of my foundation and I'm just going to go ahead and press the on button for my Thread Zap it just actually cuts right through the foundation now it does gunk the tip a little bit so you want to use an older one, the one that you won't mind if the tip gets gunky but it is a great little handy trick and then take the button, you put it right down in the hole see it comes out the other side and look what happens you now how the a flat surface to bead embroider around. So it's not going to wobble on there and we're ready to go go ahead and apply your backing. A couple options you can make another little piece like this, another little donut put it right under there as well. You're getting a little closer to a flat surface on the back and then when you put your Ultra Suede backing you could feel a little bit of a nub but you can't feel too much and if you stitched around it it would be fine. So if this was done for a pendant or even a ring at this point we could put a ring finding on there so that's one option if you're not concerned about that little nub you can just go ahead and put foundation right on it you can see there's a little bulge but it's not bad and still be comfortable to wear so this is my favorite way and I would just applied some E6000 glue all the way around the base here and then just stick it in there and you're ready to start bead embroidery so that is one way. I want to show you another way use an air dry clay. I have crystal clay here. You don't need to bake it. It dries on it's own you can use other of air dry clay products you want to mix up a little bit. This is Crystal clay. It's a two part epoxy clay you need two equal parts of park A and part B and with this if you are using crystal clay, we have videos on how to use crystal clay, how to mix it up and basically it's just equal parts and you mix it until all striations are gone I'll show you what we're going to here mix it up for a couple minutes my clay is all mixed up roll it out to a tube shape and again any air dry clay will work for this and I'm using white just because it's gonna be easiest to show against this black background on the video but you might want to use a matching color you can even paint it after it's done so roll it out now I'm basically going to just go around our shank making a donut you don't want to much. Pinch off the access it's basically just building up that backside so that my clay is level with the very top part of the glass and what I would do is I would like this fully cure overnight and then when I'm ready to go ahead and put it on to my foundation I would just glue it as if it was a solid piece as if it was one cabochon and now I would do a roll or some type of stitch to cover that and then progress with my bead embroidery however I want to the rest of my project if you're not using crystal clay, crystal clay is great because it adheres to all sorts of things so I don't need to glue this in place if you're using just a regular air dry clay you might need to glue the clay itself to the button and then you'll glue that whole piece to your foundation and then you have a nice flat back and you're ready to go just like any other focal piece so I hope I gave you a couple different ideas of how you can incorporate these beautiful glass pendants into your bead embroidery and don't worry too much about the shank. There are ways of getting around it and still being able to use them in your work. Go to www.beadaholique.com to purchase beading supplies and to get design ideas!

Customer Reviews

Based on 1 review Write a review

You recently viewed

Clear recently viewed