Just Bead It! Quick & Easy Jewelry: Epoxy Stickers

SKU VID-0097
Designer: Julie Bean
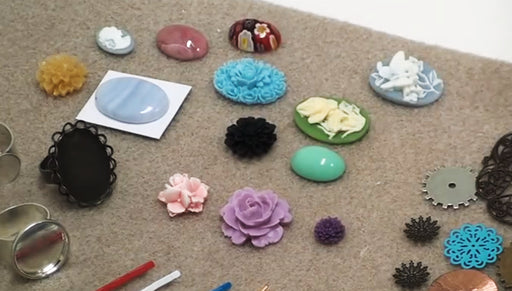
In this third installment of Beadaholique's video series Just Bead It! Quick & Easy Jewelry, we explore how to use epoxy stickers and all the different projects you can make with them. These stickers are a great alternative to resin or glass domes. At the end of the video, learn to make quick and easy magnets using bottle caps and epoxy stickers.
Audio Transcript
Note: This audio transcript is auto-generated and may not be completely accurate.
Hi. This is Julie with Beadaholique.com and I want to thank you for joining us for a third installment of Beadaholique.com's Just Bead It! video series on Quick & Easy Jewelry. This covers jewelry the you can make in just one or two steps. Today we're going to explore all the things you can make using Epoxy stickers and at the end of this video we're going to make a set of magnets using Epoxy stickers and bottle caps to begin with I want to show you what exactly an Epoxy sticker is. As you can see here they come in a variety of shapes and sizes and they come on these nice sheets where you get multiples on a sheet every sheet you get from Beadaholique.com is going to come with a protective top sheet which keeps the top surface of the stickers nice and clean and free of fingerprints then there's a protective back sheet which is what the stickers actually adhere to and Epoxy stickers are great because they mimic the look of resin or glass without all the effort so first off I want to just show you a few more of the properties of Epoxy stickers I'm going to rough cut one out of the sheet. When I say rough cut, I mean cut around the edge but not right up next the sticker. So I have a little border of the top sheet and the back sheet I'd like to peel the top sheet off pretty quickly just it doesn't get in my way and the sticker itself is just adhered to the back sheet and going to go ahead and peel the back sheet off by grabbing the corner of it bending it backwards just touching the outer rim of the sticker to stabilize it touching the sticker on both ends I'm going to do a couple things to the sticker that I don't want you to ever do I'm going to touch the sticky side and I don't know if you can see this maybe against some white you can a little bit better it's left a little bit of dirt and fingerprints You never want to touch the sticky side you're not going to want to dent the topside, I'm going to take my fingernail it will make a little bit of a dent it's not too bad but it can be dented so you want to be careful about that as well let's say you're doing a project and you want to cut down the sticker you can do that very easily, it's not gonna have the nice rounded tapered edge that the sticker has in it's original size but you do have the option if you want, you can cut down the sticker Those are a couple things you're not going to usually do to a sticker but I wanted to show you that you have the option Here are a couple of examples of projects you can make using Epoxy stickers I got this bracelet here, it actually started out as a bracelet form, just a series of bezels all connected together, which is great. It's already for you to decorate It also comes in a square shape as well I have a necklace here using a small domino very easy to make using Epoxy stickers I have some earrings done out of bottle caps. I have a scrabble tile This started as a scrabble tile and then I used a Epoxy sticker over the top and it looks great. So these are very easy to use all the projects you see here actually have videos which you can access from Beadaholique.com They'll show you step-by-step instructions and finally you can actually do very advanced projects as well using a Epoxy stickers so let's make something using a Epoxy sticker When you're making projects out of Epoxy stickers you have a lot of wonderful tools at your disposal and a lot of fun shapes I'm going to use bottle caps because I think they're so much fun and there's actually a perfectly sized Epoxy sticker for the bottle caps they're inch I like to get rid of the top player top protective sheet pretty quick so I can see everything better so when you're working with Epoxy stickers go ahead and use the sticker with the back sheet still attached as guide to see how your image is going to look under the stickers so you can see it's a great image but it's a little bit too small, it doesn't quite fit within the sticker where this one right here is going to be perfect, so I'm going to go ahead and use him This one here would be another option, it's a little bit tight but it'll still work where this guy over here doesn't really work very well, you're seeing the side edge at this part of the image as well You have a couple chances now. You can either do the method I actually prefer is peel off the sticker make sure you don't get any fingerprints you have a good idea of where you're gonna wanna place this and go ahead and just place the sticker over your image and carefully press it into place from there I'm going to rough cut the image making sure I don't disturb any of the images nearby Place my scissors right up against the edge of the sticker cut around it making sure I don't cut sticker to get your image sticker applied into your bottle cap all you need to do is take some glue and I'm using Crafter's Pick glue I'm going to place some on the back side if you've seen my videos you know I just like to use my fingers but you can use a toothpick or a small piece of wire as application as well You want to make sure that you get more glue on there all the way to the edges and then you just flip it over drop it into your bottle cap and press into place make sure you're not using a finger with glue on it so you just let that dry and then you would apply the magnet to the back now there's another way you can do this as well like I said that was my preferred method of using an Epoxy sticker. The other option is to go ahead cut out an Epoxy sticker you're just rough cutting it but on this one your actually going to cut it out with the protective backing still on when you get that very end It's a little hard to see I left just a little bit of the backing on there so now what you can do it this is you can find the image you want to use I want to use this guy right here take a pen or pencil you can trace around your sticker it's not gonna be a complete circle because you do want to leave a little lip, a little edge trace around and then you're going to cut this out imagine where that circle was complete if you're making a lot of these I would suggest actually just sacrificing one of your stickers and cutting all the way up to the edge all the way around so you don't have that little lip left over and then use that every time you trace around an image but now if you're doing it this way take your glue place it on the back side of your image place image into your bottle cap make sure you pressed down on the sides and you would let that dry we're not going to take the time to let it dry in this video but let that dry for a good fifteen or twenty minutes then go back take your sticker and this is why you had to leave that little bit lip. You need to be able to grap on to that to pull off your backing Take your Epoxy sticker and place it over your image very carefully place the sticker on top of the image once it's fully dry and press it into place it's a little bit harder to press this into place if you're working with a bottle cap here or anything already applied the sticker ahead of time to the image but both ways work. Find which one works best for you now all that's needed to make these into magnets is to take a magnet. I have a craft magnet here take some E6000 glue place some on the back of the magnet flip over my bottle cap the magnet is actually attracted to the bottle cap press it into place and let it dry do that on the other one two take some glue let that dry and you have magnets epoxy stickers are a great medium to work with they're quick, inexpensive and easy and they require very few tools and create little mess I hope you've enjoyed exploring just some of the uses with me today and I hope you are inspired to create some of your own projects

You recently viewed

Clear recently viewed