Note: Components and tools listed within this INSTRUCTIONS box and the printer-friendly PDF, if available, may have been discontinued since
this project was published. Refer to the PURCHASE COMPONENTS and TOOLS AND OTHER SUPPLIES sections for current availability.
- Below are written instruction but you can also view our comprehensive video tutorial on this project.
- Cut 5 feet of 26 gauge wire.
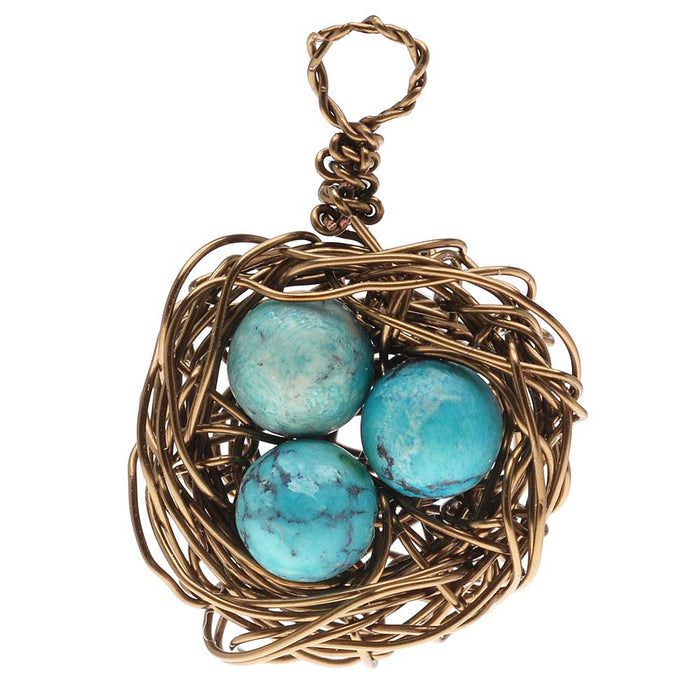
- String onto the wire 3 turquoise beads. Slide them about 4 inches down one side of the wire and then twist the sides of wire together, thus securing the beads. Make 3 or 4 twists.
- You will now have an approximately 3 inch tail of wire and another tail that is over 4' long. Leave the 3" one sticking straight out. Take the longer wire end and begin to literally mess it up, make bends in it, twist it in different directions, you can even twist it around a pencil and then pull it off. You can do anything you like to the wire to make it crinkly, just do not create any knots or loops.
- Holding your beads in the center, wrap your long wire around the the outside of the bead cluster 5 or 6 times, then anchor the wrapping by threading the wire in and out of the center bead cluster (along the edges, not the center), down and around, up and over your loops. Do this on all sides of your bead cluster. There is no wrong way to do this, just do what you need to secure the wire. Once that is done, wrap some messy circles under your bead cluster, then secure them by weaving the wire in and out of areas already secured. Keep making loops and filling in your wire, you want i t to be messy, the only thing to keep in mind is to keep the shape of the nest circular and fairly even on all sides. Stop when you have about 3 inches of wire left and your last weaving ends at the place where your other 3 inch wire tail is sticking out.
- Tightly twist the wire tails together using your fingers and once you can twist no more, snip off any uneven wire lengths with your flush cutters. Then create a large wrapped wire loop.
- These are addictive to make, have fun making many more......
WHAT YOU'LL NEED: (scroll down for purchase options)
- WCR-4202 - Artistic Wire, Copper Craft Wire 26 Gauge Thick, 30 Yard Spool, Antiqued Brass
Project uses 1 package. You will need package packages.
- SPTU-06 - Blue Turquoise Gem Round Beads 6mm Stabilized /15.5 Inch Strand
Project uses 3 pieces. You will need 1 package.
RECOMMENDED TOOLS:- XTL-5514 - Beadsmith Jewelry Fine Round Nose Micro Pliers
- XTL-5511 - Beadsmith Jeweller's Micro Pliers Chain Nose Flat Nose
- XTL-5600 - Xuron Sharp Flush Cutter Pliers - Wire/Soft Flex

")
 Earn Reward Points with your purchase of project components or tools.

 Thick, (1 Piece)")