
|
Toho Round Seed Beads 11/0 #PF557 'Galvanized Starlight' 8g SKU: JSK-0277 $3.95 |

|
22K Gold Plated Open Jump Rings 5mm 20 Gauge (100 pcs) SKU: FJR-5250 $6.59 |

|
Lobster Clasps, Curve 10mm, 22K Gold Plated (6 Pieces) SKU: FCL-4720 $4.99 |

|
Toho Round Seed Beads 11/0 129 'Opaque Lustered Pumpkin' 8 Gram Tube SKU: JSK-0055 $2.55 |

|
Wubbers Classic Series Chain Nose Quality Jeweller's Pliers SKU: XTL-0033 $29.99 |

|
Wubbers Classic Series Round Nose Quality Jeweller's Pliers SKU: XTL-0034 $36.99 |

|
The Beadsmith Cordless Thread Zap II Thread Burner Tool SKU: XTL-0106 $16.49 |

|
The Beadsmith English Beading Needles Size 12 (4 pcs) SKU: XTL-3006 $3.99 |

|
FireLine Braided Beading Thread, 4lb Test and 0.005 Thick, Crystal Clear (50 Yards) SKU: XCR-1275 $13.99 |
Related Videos

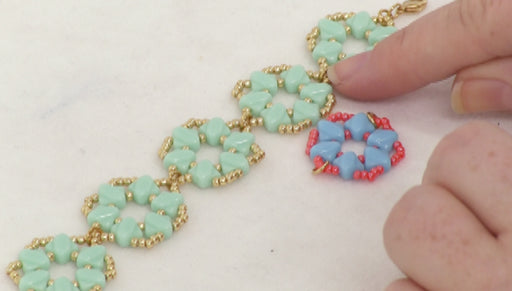
How to Make the Camille Bracelet
In this video you will learn how to make the Camille Bracelet, using Czech Glass 2-Hole Silky beads and Toho seed beads.