
|
Nunn Design Open Bezel Pendant, Circle with Channel 24.5x29.5mm, Ant. Silver (1 Pc) SKU: PND-00620 $6.89 |

|
Nunn Design 2-Part Epoxy Resin Kit, Jewelers Grade Clear, 8 Oz Kit SKU: TRC-14 $44.09 |

|
Easy Mold Silicone Molding Putty for Casting and Jewelry Making 1/2 Pound SKU: TRC-60 $24.99 |

|
CASTIN CRAFT Casting Epoxy Resin Opaque White Pigment Dye 1 Oz SKU: TRC-87 $10.99 |

|
Crystal Clay Sparkle Dust - Mica Powder 'Silver' 1.5g SKU: XTL-1155 $5.79 |

|
Casting Epoxy Resin Mixing Cup Set With Brushes and Sticks SKU: TRC-01 $13.99 |
Related Videos

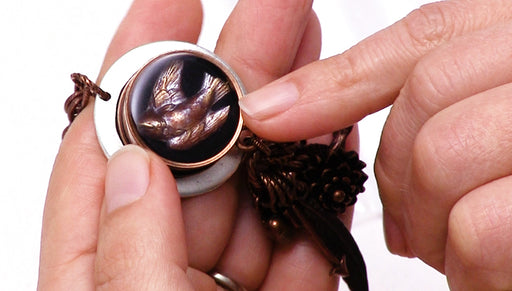
How to Create a Shadow Box Pendant with Nunn Design Resin by Becky Nunn
In this video you will see how to colorize a stamping using mica powder and Nunn Design sealant, how to use a 2 part epoxy clay and how to pour cle...
View full details
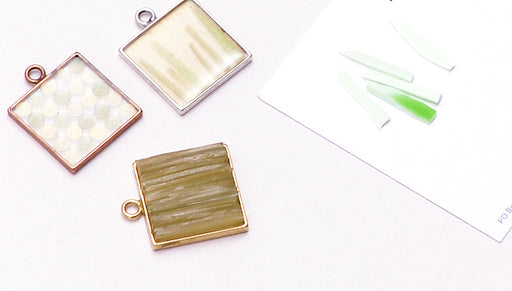
How to Use Excess Colorized Resin Pieces to Create Mosaic Pendants by Becky Nunn
In this video you will learn how to use the last bit of resin from your projects to make a mosaic pattern in a new pendant. This is a great techni...
View full details
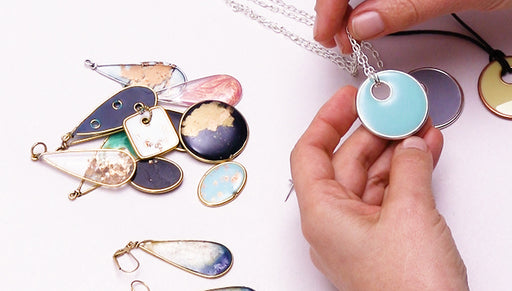
How to Use Colorized Resin in an Open Frame Hoop by Becky Nunn
In this video you will learn how to use colorized resin in an open frame hoop to create pendants and components for your jewelry. For this techniq...
View full details