|
Antiqued Copper Alligator Hair Clips With Diamond Filigree Adornment -2 Inch (4 pcs) SKU: FCO-9065 $2.99 |

|
G S Hypo Cement Precise Applicator Essential! SKU: XTL-1001 $9.35 |

|
Crafter's Pick The Ultimate Permanent Glue Cement Adhesive 4 OZ SKU: XTL-1026 $8.75 |

|
SKU: XTL-4004 $17.99 |

|
Fiskars 5 Precision Tip Scissors - Super Sharp SKU: XTL-5700 $7.45 |
Hi, this is Julie with beadaholique.com - so if you are giving this as a gift it's a really nice presentation or you even consider hanging this on top of a gift so I just thought that'd be a fun little add-on to this video so for the barrettes themselves you're going to need these little barrettes they come like this with the filigree already attached to the alligator clip you're going to need some size ss7 Swarovski flat back crystals some GS hypo cement to attach the crystals to the bread and then a tool such as the magical pick to be able to pick up the rhinestones and put them into the glue so that's what you need for the actual barrettes now to make the card you're going to need some scrapbook paper so I have a little folder here that I've used a lot of a little notebook you're going to need some glue I'm going to be using crafters pick glue some glitter to do around the edges which is really fun some type of hole punch to be able to punch a hole to hang your ribbon from and I'm actually using a jewelry hole punch because it's what I have on hand but if you have a regular paper hole punch that will work absolutely fine and then some ribbon and this is a great use for maybe some of your scrap ribbon that you have that's maybe not long enough for a project but would be perfect for this application so let me first show you how to do the barrette very very easy to do we're gonna be using the GS hypo cement what's really nice about this particular glue is you see it's got a really fine applicator tip which means we don't have to use any type of external applicator to help us apply it so I'm just going to put dots of glue wherever I'm going to want a rhinestone and I actually have a little bit of working time with this I wouldn't wait too long but enough time to actually be able to put all my dots so whenever you are done make sure you go ahead and put the lid back on here because you see it as gooping out a little bit so you want to make sure that that needle goes back into it I apologize I'm trying to do this a little further away instead of being right over it so you can see it versus my head blocking it let me go ahead and get rid of that glue I just don't want too much glue right there there you go so you put the needle in it and screw the lid back on so now that I've got my glue dots I'm just gonna pick up each rhinestone with my magical pick and set it down into the glue do whatever pattern you like and apply as many rhinestones as you like so this is a great project if you are wanting to make multiple gifts they come together really quickly and easily so they're great if you you know maybe need five different gifts for people and you want to be able to do it on a budget because it doesn't cost very much of course but it looks really pretty but also you want to be able to do it in an afternoon and you'll be able to make five sets of these easily in probably an hour not even that so just like that we have decorated our Brett you can see the difference so you'd do that for both of them so now let's go ahead and make this little card it's a nice little added touch so I've got some paper here that I'm gonna be using and this is a very well-loved book and I can just pick whatever sheet I want so I'm gonna take this one here I'm gonna cut it out actually go ahead get that out of there because I know I'm not going to be using that corner edge so for this I'm going to fold it in half and then I'm gonna fold it in half again now I want to add some glue so that glue all my layers together so I really like crafters pick for this application it's just thick enough but not so thick that I can't spread it and I am gonna be using my fingers and I'll just wash my hands afterwards if you want you can use a toothpick or whatever you like to spread this glue I'm one of those crafters artists who really just likes to use her fingers sometimes okay so we want both sides this one I want to work fairly fast but I also don't want to make this glue so thick that it over saturates my paper a little bit of saturation would be fine okay there we go glued it together so it is now gonna stay that way now if you had a piece of paper that was really thick to begin with you wouldn't necessarily need to do this you could just cut it into the shape that you want and then glitter the edges like I'm going to show you in a minute it's just because this paper was a little bit on the thin side to start with that I wanted to bulk it up so it had more weight to it to really hold our clips so now I'm going to go ahead and glue these two halves together thank you so so I'm going to let that dry now I want to let dry a good 20 minutes and then when I'm done with that I'm gonna trim it and glitter the edges all right now that this is dry we're gonna cut it out so you see in the example i went ahead and i created a curve up here so that's gonna be really easy to do you just take your scissors and we're just going from one corner to the next creating arch there we go and i'll pull out some printer paper this is because we're gonna be glittering and glitter as you see here gets everywhere and you'll probably be seeing this glitter for the next eight videos because it's really hard to get off of places that you don't want it to be so i like to always do a little bit of do my glitter work on a piece of paper so here we go I'm gonna take my glitter open it so it's ready to go this glitter here is art glitter and this is flax there's a lot of different colors to choose from now I'm going to go ahead and put a generous amount of glue on my pad of paper and I'm just going to dip the edge into the glue now you can dip it as far up as you want yeah so really that's totally up to you so now I'm going to create a pile of glitter and then dip that glue into it I'm also going to just go back and make sure I get it on both sides and now I'm going to go ahead do the other edge same way it looks quite yellow right here but you notice when I actually use it that yellow is not as intense it's just because the glitter is in a big pile that that yellow is really coming through but it's much lighter when you apply it now I'm going to do this top edge that looks good and again I'm just gonna dip it into the glitter hey there we go and actually it's okay to put this down on paper if you're concerned about it sticking to the paper you can put it on a plastic bag but once you've coated that glue is really not that sticky anymore because you've coated it I found this okay to just lay this down but if you are at all concerned go ahead and put it on a plastic bag or somehow prop it up like here on this post you can do something like that so it dries in the air so just kind of pencil how much glue you used and how coated you how much you coated that glue so now we're gonna let that dry and then when we're done we're gonna go ahead and attach our ribbon to it so we can hang it from a gift or just have it so it's like a little hanging jewelry display that someone might want to put on their vanity or next to their mirror alright I'm ready to add my ribbon so I've just got this really pretty piece of silk ribbon that was leftover from my previous example so now I'm gonna pick this up and I'm gonna hole punch it so I am using jewelry hole punches is what I had on hand if you plan on making a lot of these you can go and buy an inexpensive pair of paper hole punches pliers um you believe you can find them at the dollar store so that's just something to keep in mind I would not use these repeatedly for this but in a pinch they do work so we're just gonna punch a hole and we actually need a couple holes here to make it big enough to put our ribbon through then take the end of your ribbon you're just gonna feed it through now a tip is if you don't have a very big hole and you want to be able to push this through just take your pliers push it through to the other side pull it and then you're just going to be able to tie a bow or not whatever you might like up top and then all you'll need to do is you've got this and then you'll just clip your finished barrettes to your piece of paper and is a really pretty presentation and a nice way of giving this as a gift so here was my other example you can see here it's a little bit different color glitter and different paper so a lot of variation you can do with this idea and you can find all the supplies for it at beadaholique.com you
Related Videos


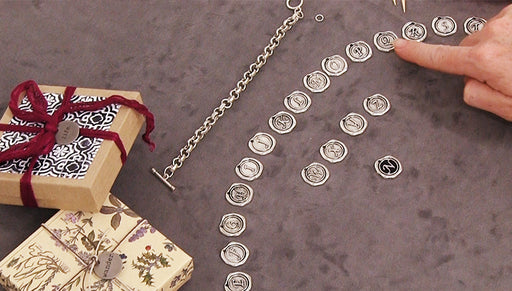
How to Add Patina to a Wax Stamp Style Charm
In this video learn how to easily add patina to the recessed area of a wax stamp style charm. With or without the patina, these are lovely initial ...
View full details

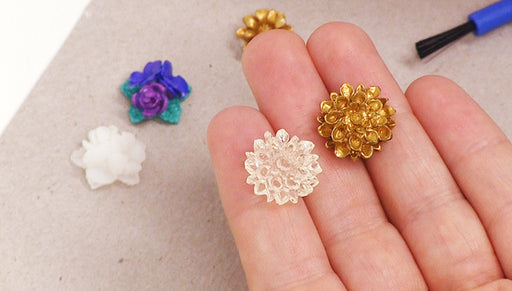
How to Use Vintaj Patina on a Lucite Cabochon
In this video you will see how easy it is to customize lucite cabochons using Vintaj Patina.


How to Create a Translucent Glaze on Charms
In this video learn how to quickly and easily create a translucent milky glaze on metal charms.
