How to Embellish Peyote Stitch Bead Weaving with Brick Stitch Accents

SKU VID-1338
Designer: Rachel Zaimont
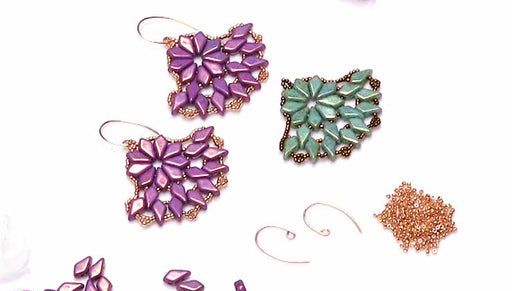
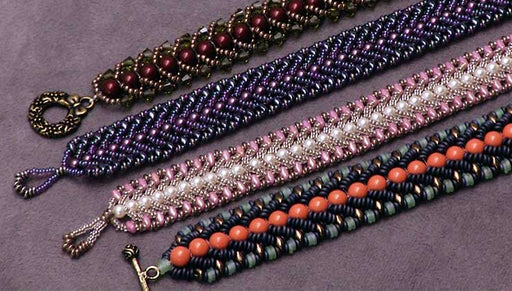
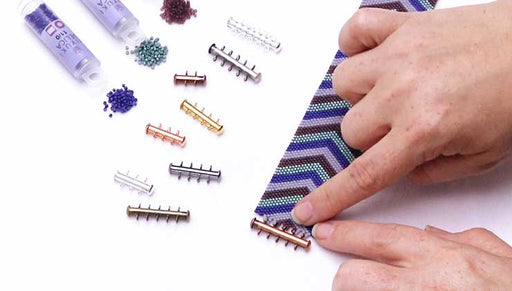
Expand your bead weaving skill set by learning how to add brick stitch embellishments to the edges of your peyote stitch jewelry. This tip will allow you to create outside-the-box bead woven patterns that really pop!
Audio Transcript
Note: This audio transcript is auto-generated and may not be completely accurate.
hi this is rachel with beadaholique gonna show you how to embellish peyote stitch with brick stitch accents so we have a bead woven piece here and the majority of this piece is done using flat even count peyote stitch and we have another video showing you exactly how to do this stitch so just as a reminder peyote is where you go back and forth with your beads and you create staggered rows and it's perfect for incorporating patterns so here I have a pattern that incorporates some autumn leaves and berries just as one example now peyote stitch creates straight strips of bead weaving like the bottom of this piece here but you don't have to be limited by that you can actually create a pattern that extends beyond the boundaries of your straight strip of peyote and you can color outside the lines so to speak using brick stitch accents so I'm going to show you exactly how to do this I'll just show you the top of this piece here which is where I did that so the middle is the flat peyote section and outside you can see little areas where I just added extra rows of beads like on this leaf and on these berries here but it just really makes your pattern pop so I'm going to show you how to do that so I have my pattern here print it out just so I don't get lost and I also have my autumnal palette of Miyuki round seed beads here and I'm using some smoked fireline thread with a size twelve beading needle so the first thing you want to do is get to the place in your beadwork or where you want to start adding your extra rows and I already did that so I am on the outside of a leaf here and I'm going to add a couple of extra beads using increases and decreases in brick stitch and we have another video showing you exactly how to make increases and decreases in your brick stitch that goes into more depth but for the purposes of this video I'm just going to show you what is possible when you combine peyote stitch and brick stitch so I'm gonna start Saro by making a decrease and so I just picked up two beads and I'm going to go under the second thread bridge on the outside of my panties and I'll just pull those beads on go back up through my second bead and then to secure these two beads in place I'm just going to go back down through my first bead and up through the second one again so now I've just attached the first two beads on the outside of my pea tees strip and looking at where I am here I have four beads in this row so I'm going to add two more individually just pick up one bead go through the next thread bridge and up through that bead and that is your classic brick stitch I'm gonna do that once more and what's great about doing this on the outside of a peyote piece is that peyote creates these thread bridges all along the side so you can just capitalize on those thread bridges that are already there and start building your brick stitch dimensional rows so that's my first row and next in my pattern I have a little row of two beads and I want that little row three positioned on the upper end of the road that I just did so something I'm gonna do now is just weave through my beadwork to have my needle coming out where I wanted really the big skill that you will need when you're doing this is just mobility it just involves being able to get around in your beadwork to get to the place where you want to start adding new rows so I just did a little loop and now my needle is coming out of the adjacent bead there which is where I wanted so I'm gonna pick up two beads go through the second thread bridge and this will just be a row of two beads so just like before I'm gonna go back up through that second bead and pull and then go back down through the first bead and up through the second one again I don't care for lot to get caught on your piece and when I pull that flattens that row down and now I've just added this outer portion of the leaf so now I'm going to sew back down into my beadwork again just that mobility getting from place to place in your beaded piece and the next place where I want to embellish is by adding on some of these little berries so I'm just going to get over there with my needle okay so now my needle is coming out right around where I'm going to create this berry coming off the side of the piece and so I'm going to pick up two of these beautiful lustrous red seed beads and go through the second thread bridge you can really add as many rows of brick stitch as you want on the outside of your peyote piece I stuck with no more than two additional rows of embellishment but that's just for this pattern you can do whatever you want okay so those are the first two rows of this pattern the middle of the berry has three beads in it so I'm going to add one more bead here and now I'm gonna do the last row of just two beads sitting on top of this row of three so I'm gonna pick up two red beads create my very short row and if you notice I'm really just using the same technique over and over which is starting a row of brick stitch on a decrease you can also make increases the only limit is your imagination all right so now this little berry is done so I'm just gonna sew back down and I'll do one more berry for you I really like working with these Miu key round beads they have such a beautiful texture and really gorgeous lustrous colors here all right so I'm just gonna do a little bit of fancy footwork with my needle to get it coming out the bead that I want I'm just gonna sew down into the previous row and up through the adjacent bead and up out the same bead of the outer row alright so now that I'm here I'm just gonna add a row of two because I have the first two rows of this berry already incorporated into the peyote body of this piece so little row of two going on through that second thread bridge and up through the second bead down through the first bead again and up and out to secure that outer row so there you go you would just do this throughout the rest of this pattern following the pattern that you create and you can create a really beautiful dimensional piece and adding these little brick stitch accents really just makes your pattern pop and brings it to life so you can find the tutorial for this project as well as the pattern and all of the beads here at beadaholique.com thanks so much for watching you

You recently viewed

Clear recently viewed